The WP Gmap Pin Locations plugin allows easy integration of Google Maps on your WordPress site to display single or multiple locations. Customize map size, design, and markers effortlessly. With features like shortcode generation, bulk location management, and export options, this plugin enhances user engagement by transforming your site into a dynamic, map-driven experience.
This guide will walk you through the installation, setup, and key features of the WP Gmap Pin Locations plugin
Installation and Activation
To get started with WP Gmap Pin Locations, follow these simple steps to install and activate the plugin.
After purchasing the plugin, you’ll receive an email containing the plugin’s zip file. download the plugin zip file from your email or the source provided.
- Log in to your WordPress dashboard.
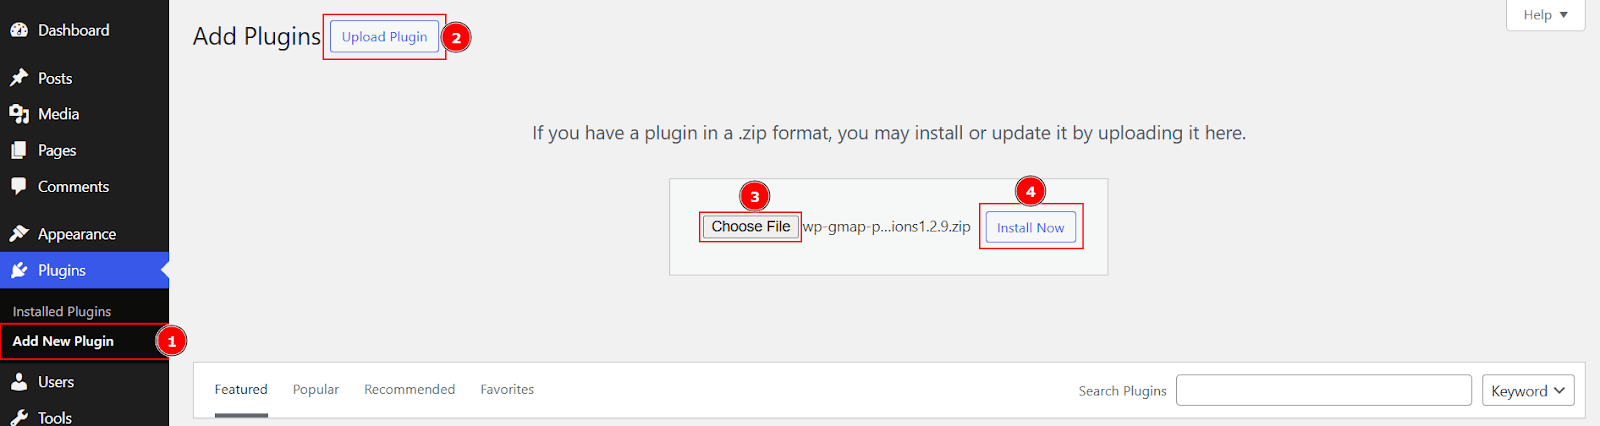
- Navigate to Plugins → Add New → Upload Plugin.
- Upload the downloaded zip file, click Install Now, and then Activate the plugin.
License Key Activation
After installing and activating the plugin, navigate to your “AIPostPilot License” page. Paste your copied License Key and press the “Activate Plugin” button. (Check your email for a license key)

Google Map API Key
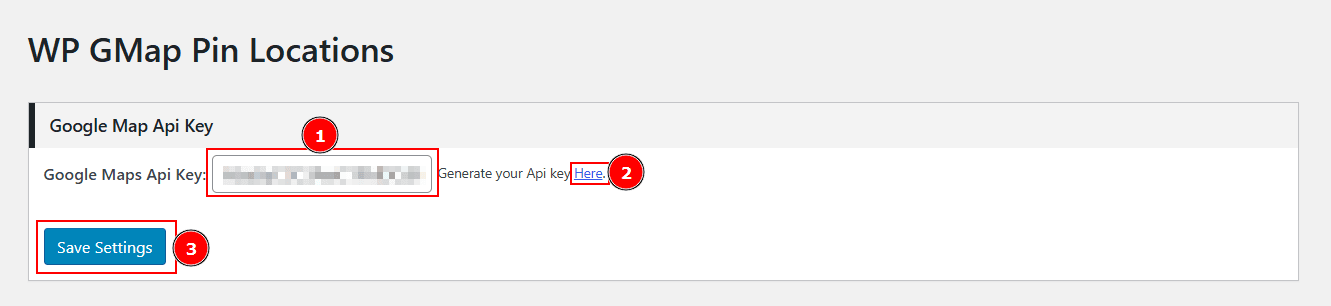
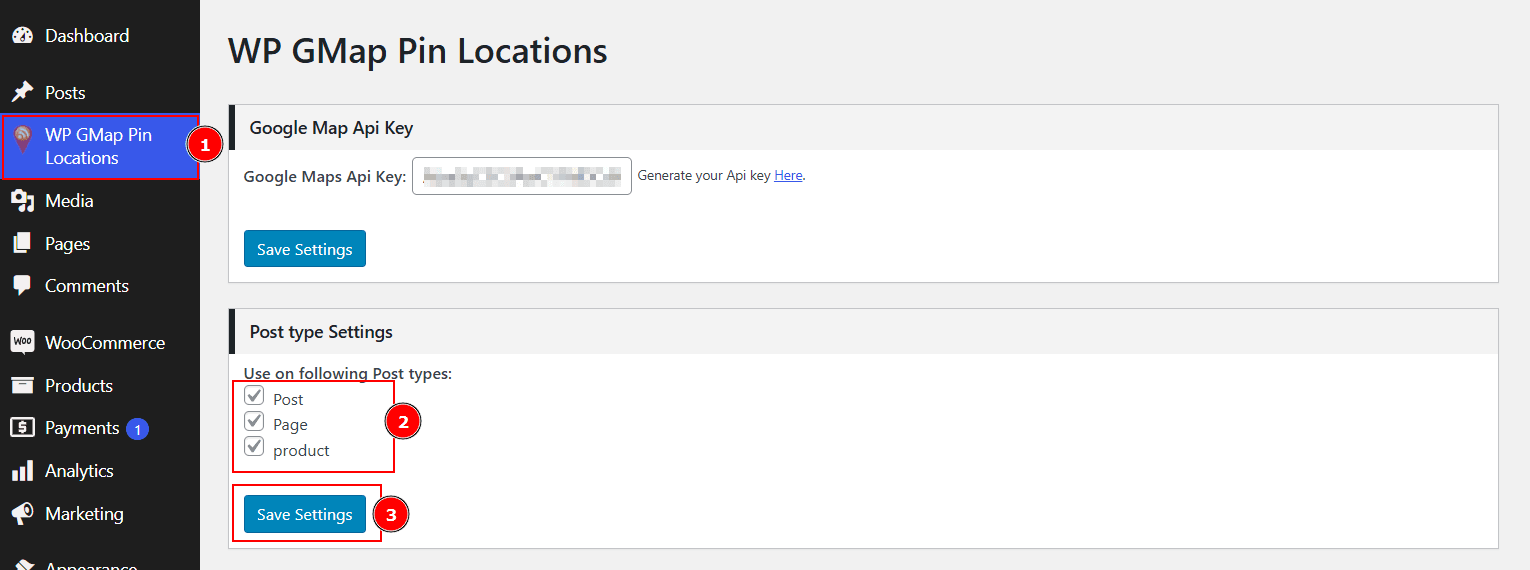
In order for the WP Gmap Pin Locations plugin to work correctly, you need a Google Maps API key. This key authenticates the plugin to retrieve and display Google Maps data. To set up your API key:
- Go to the WP Gmap Pin Locations page in your dashboard.
- Paste your Google Maps API key in the field provided.
If you don’t have an API key, click the link given against the API key field to create one. - Click Save Settings to apply.
Post Type Settings
The plugin allows you to select specific post types to associate with maps. Navigate to the “Post Type Settings” section and choose the desired post types. This customization ensures that maps and locations display appropriately based on your selected post type.Save your settings after making post type selections.
Map Preview Settings
Customize how your map looks and functions by adjusting the map settings. Under Map Settings, you can select a map style that suits your website’s design. The plugin offers various predefined styles for you to choose from.
Map Type
Choose a map style that best aligns with your website’s design, with a variety of predefined styles available for selection
Enable/Disable Map Controls
Enable or disable controls such as Map Type Control, Full Screen Control, Street View, and Zoom Controls based on your preferences.
Marker Animation
Choose a marker animation effect (e.g., bounce or drop) to enhance your map’s interactivity.
Info Window Settings
For displaying information, you can decide whether the info window should appear when users hover over a marker or when they click on it, providing greater flexibility in how your map’s data is presented.
These settings apply globally, ensuring every map on your site looks cohesive and professional.
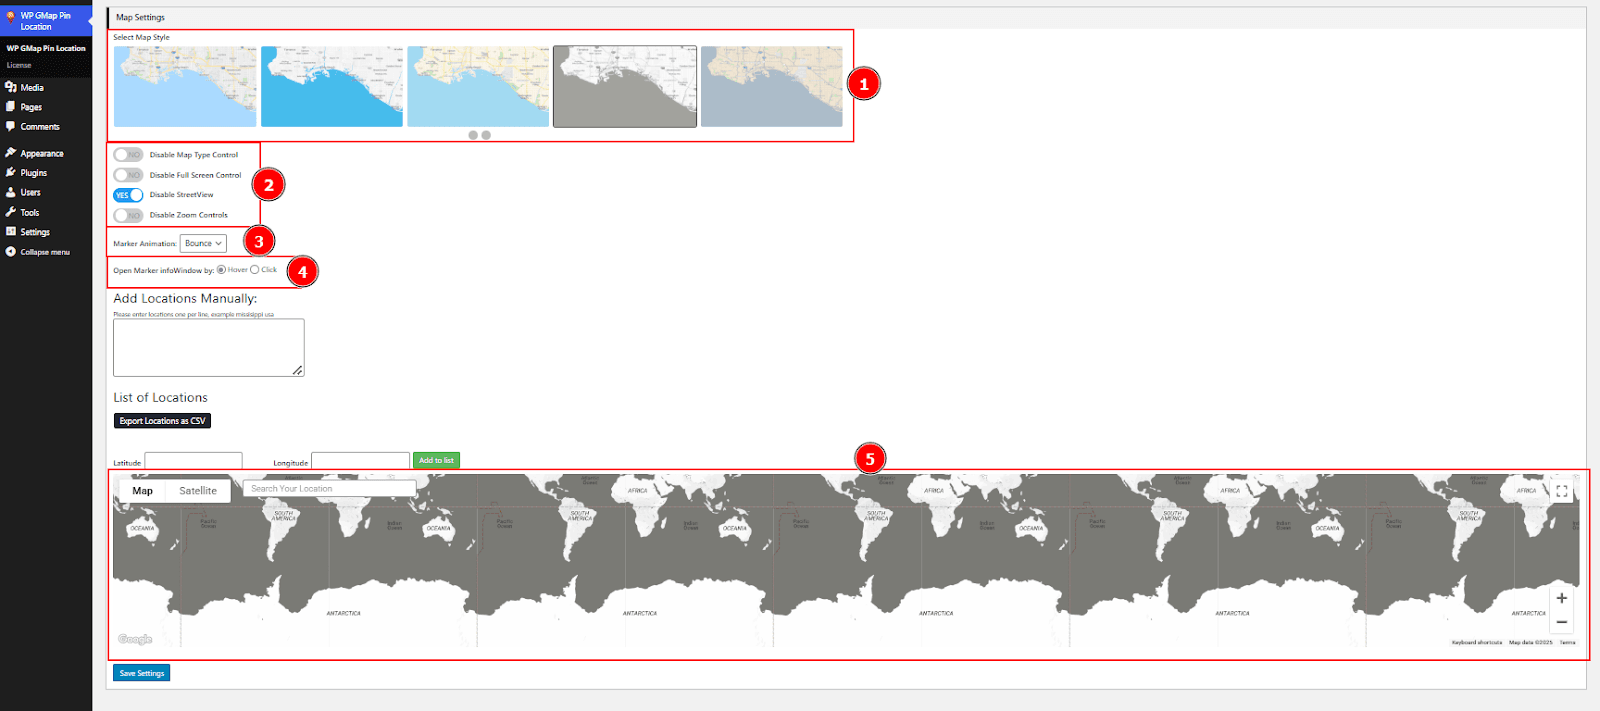
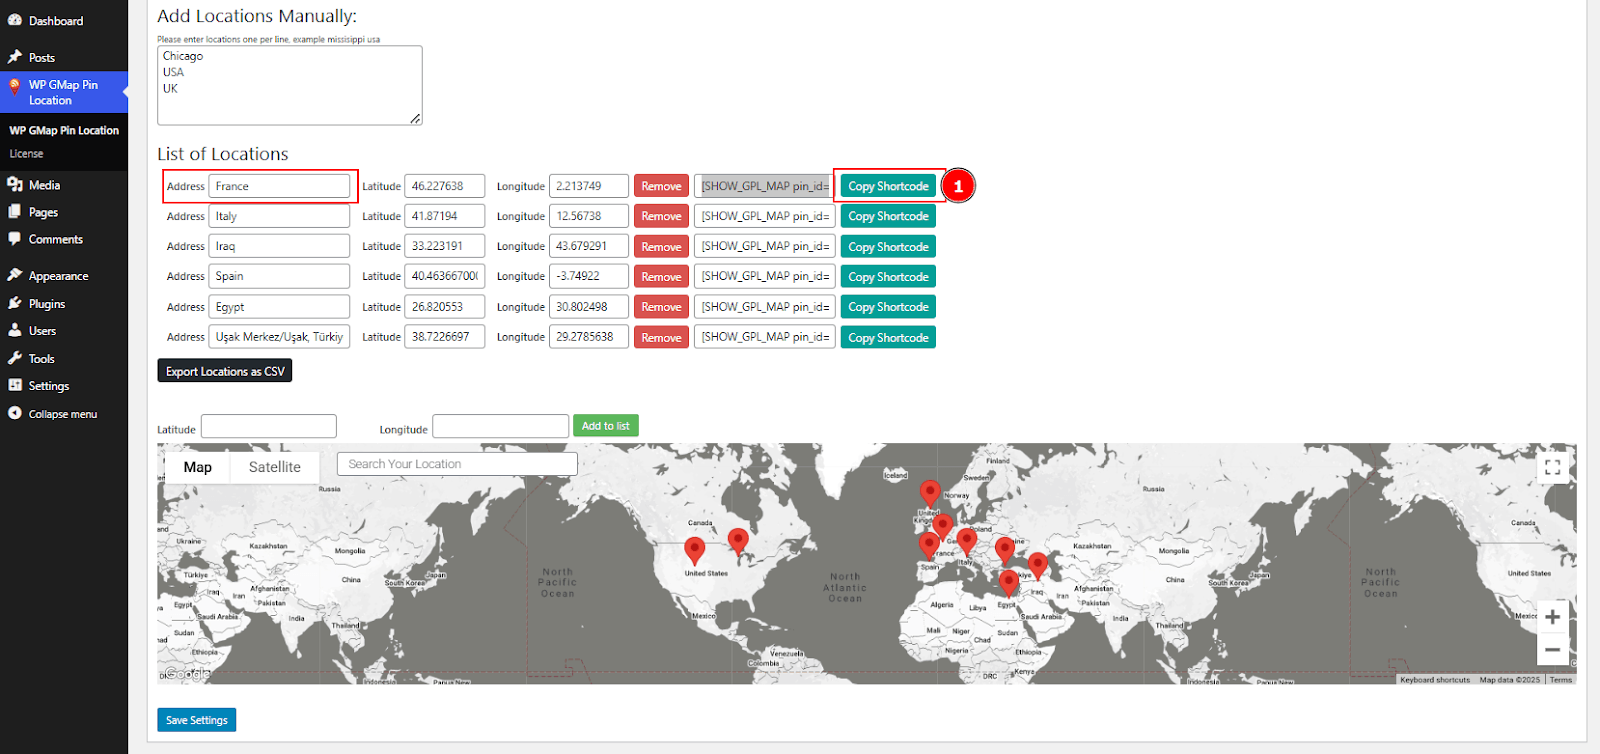
Adding Locations Manually and Exporting
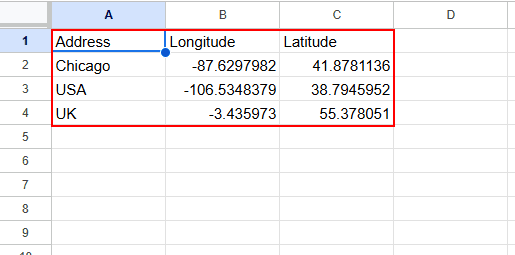
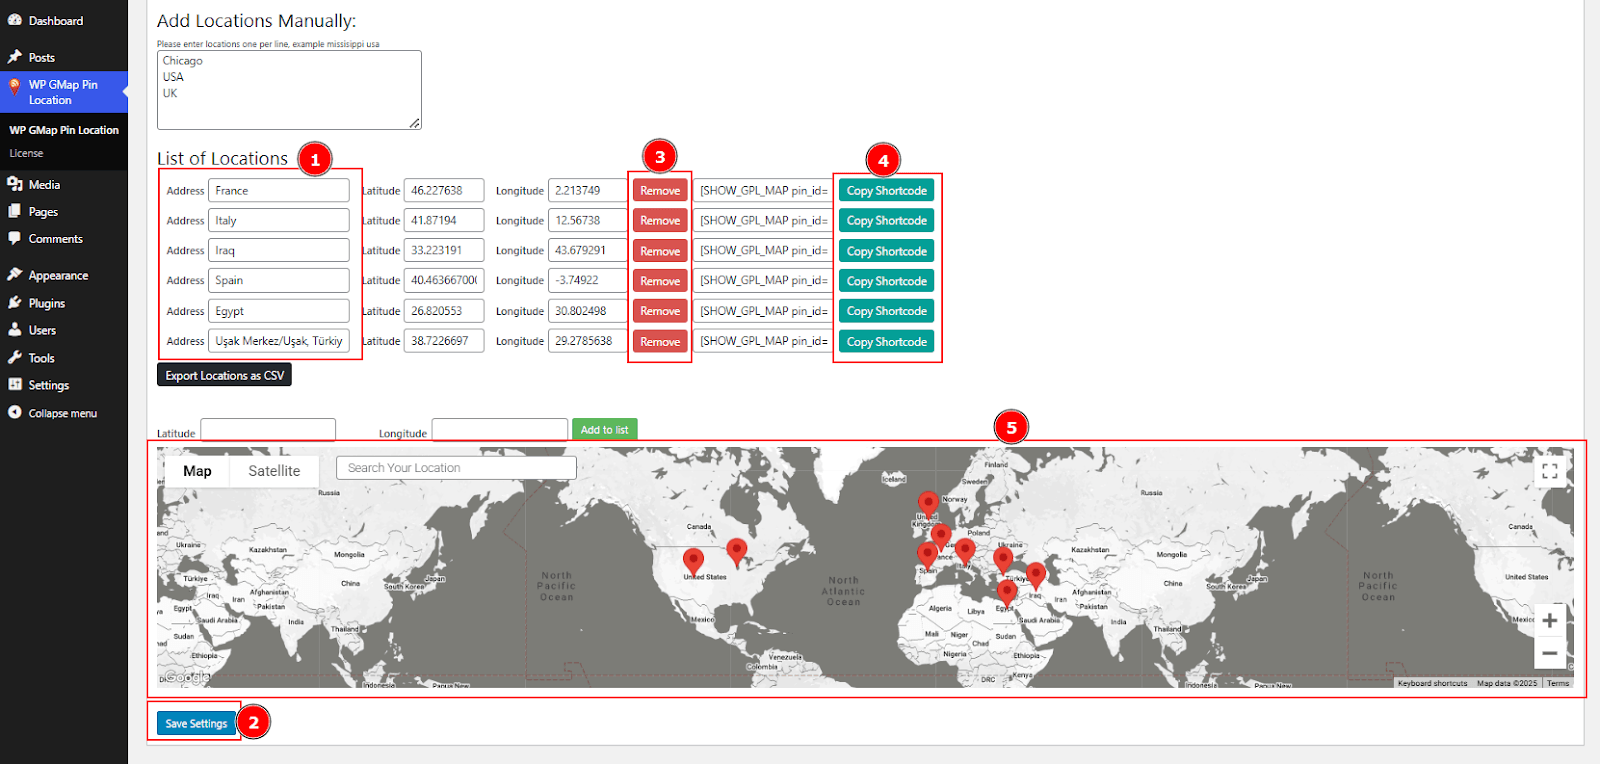
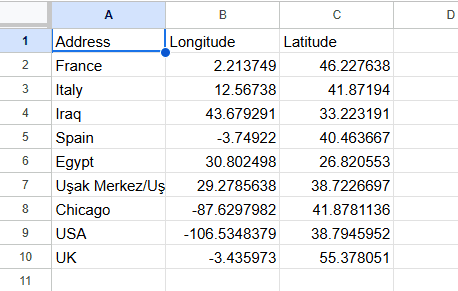
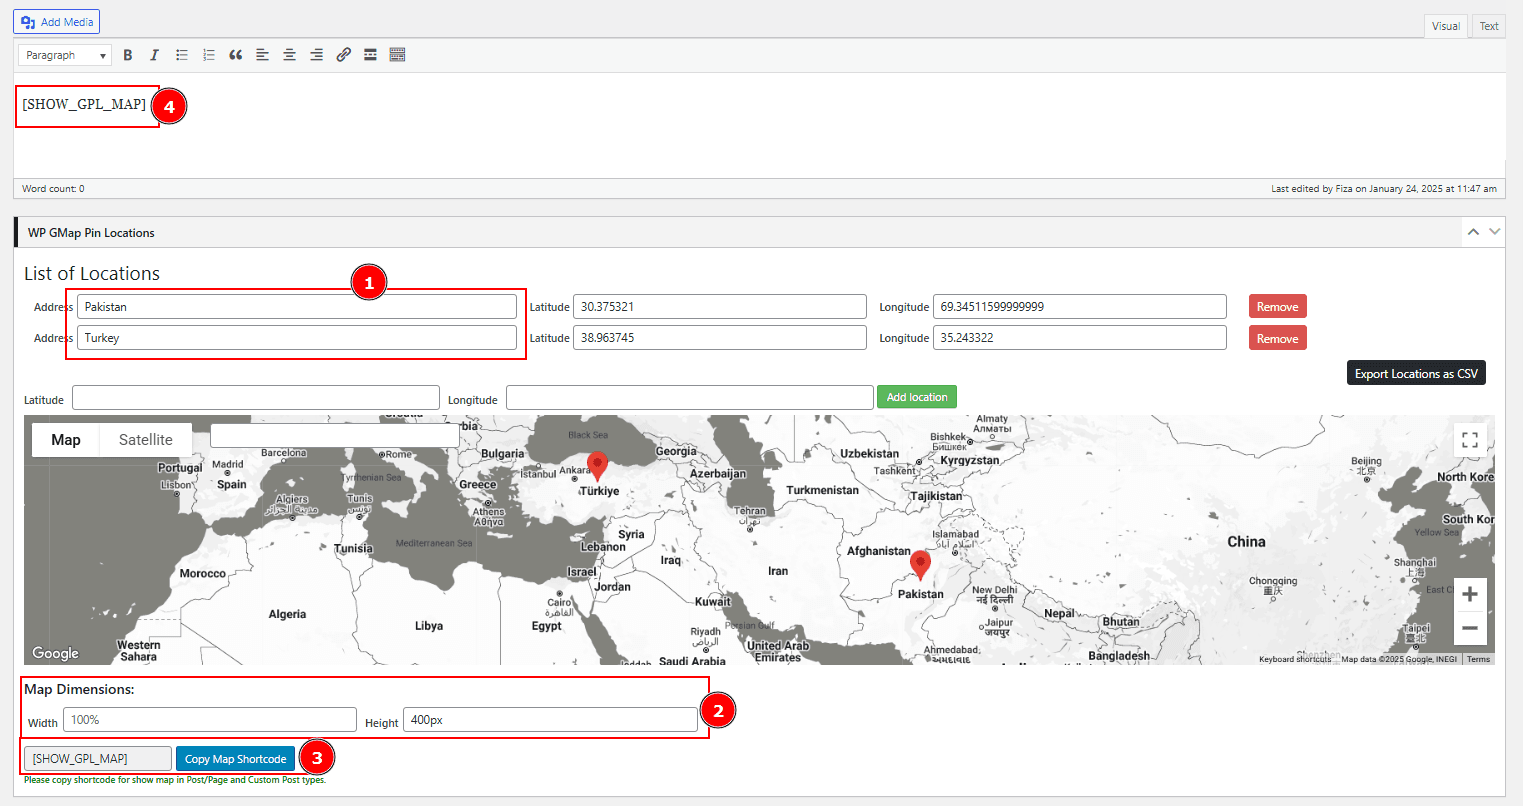
To add a location manually, go to the “Add New Location” section. Enter each location on a separate line and click the “Save Settings” button. The locations will then appear on the map instantly. Additionally, you can export all stored locations by clicking the “Export Locations as CSV” button, allowing for backup or reuse.
Use the import feature to add multiple locations at once. Ensure your data is formatted correctly for a successful import
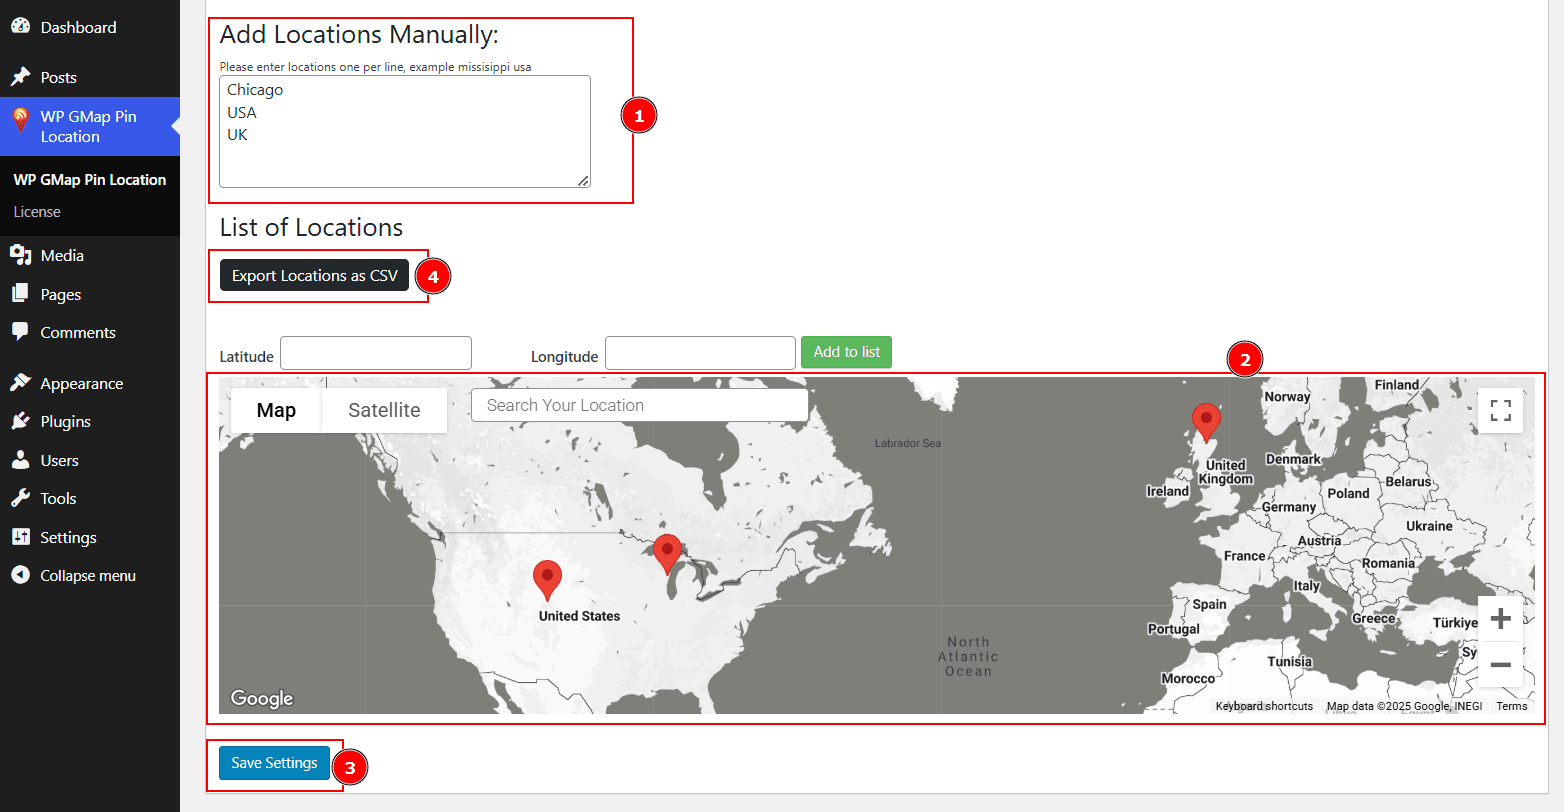
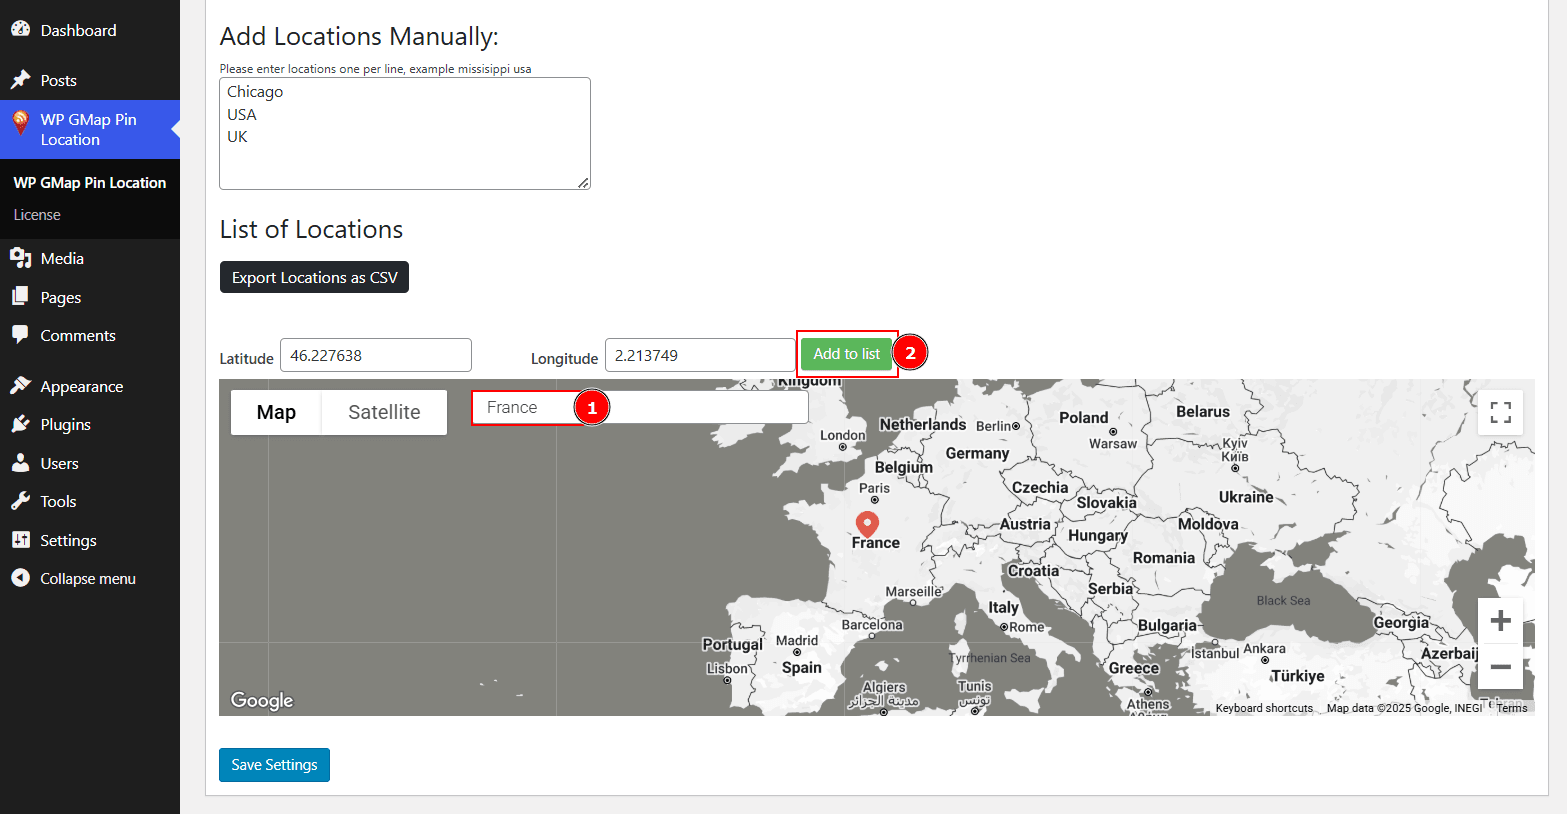
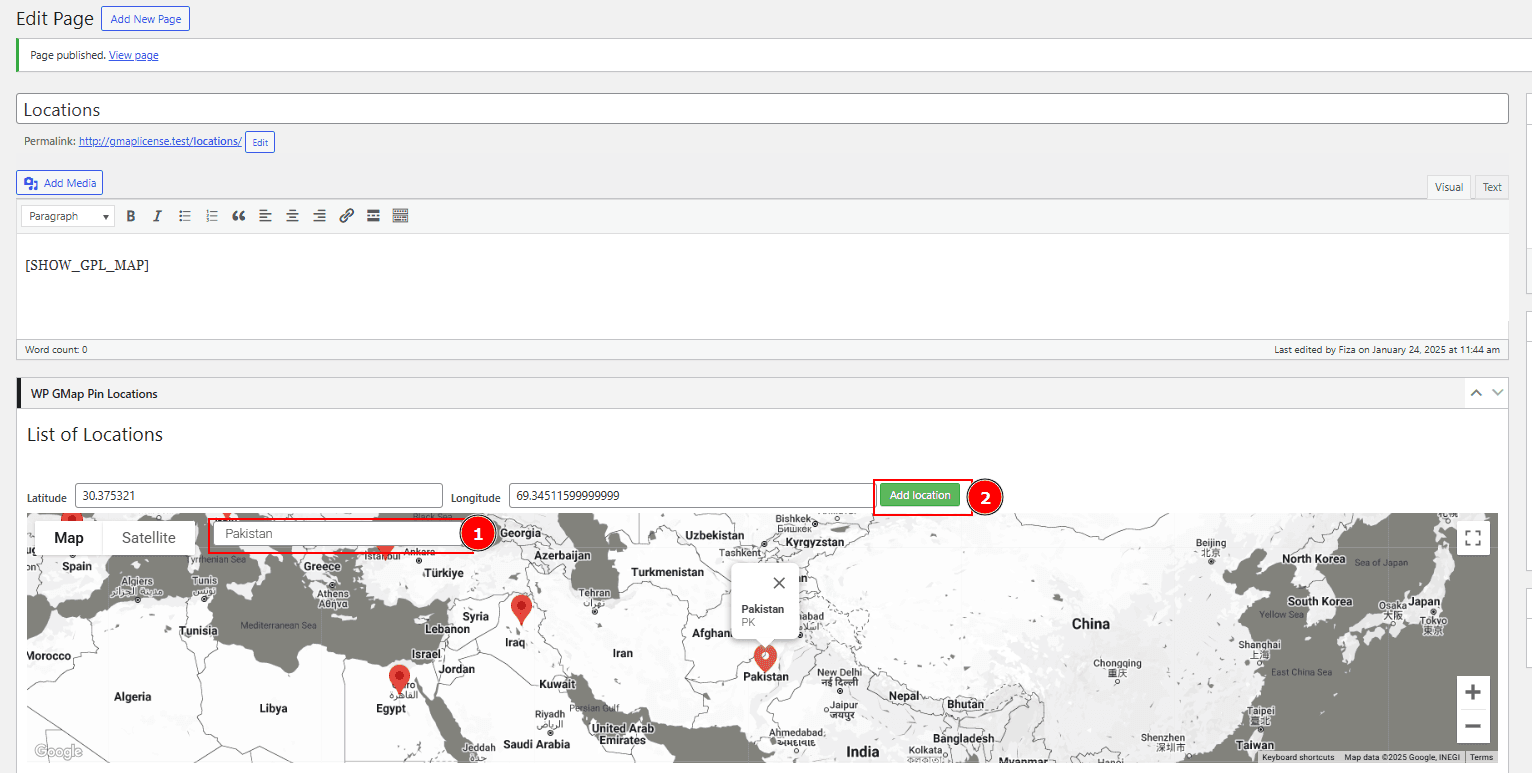
List of Locations
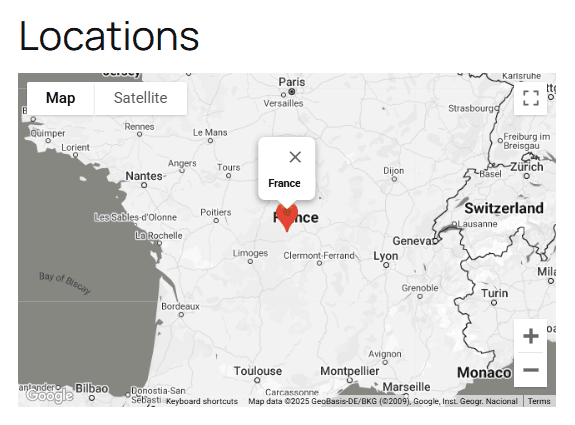
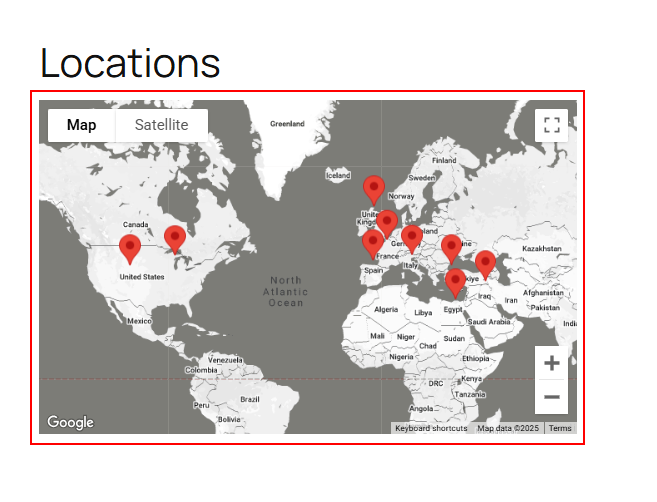
You can use the map’s search bar to find a location, then click the Add to List button to include it on your map. To delete a location, click the Remove button next to the respective entry. The plugin also provides an option to copy the shortcode, making it easy to display the map wherever you need it by simply pasting the shortcode in the selected post type. This organized list helps you manage your location data efficiently. Changes made here are immediately reflected on the maps. For single locations, Copy shortcode of single location [SHOW_GPL_MAP pin_id=”0″] shortcode. When using this shortcode Only one location will appear on the map.
Post Type Single Page:
Navigate to the post type page you selected in the WP Gmap Pin Location plugin settings. Add to list new locations according to your need. These locations will only appear on the specific page where they’re added. Here, you can also set map dimensions tailored to individual posts. Once configured, copy the generated shortcode and use it anywhere on your specific page. For instance:
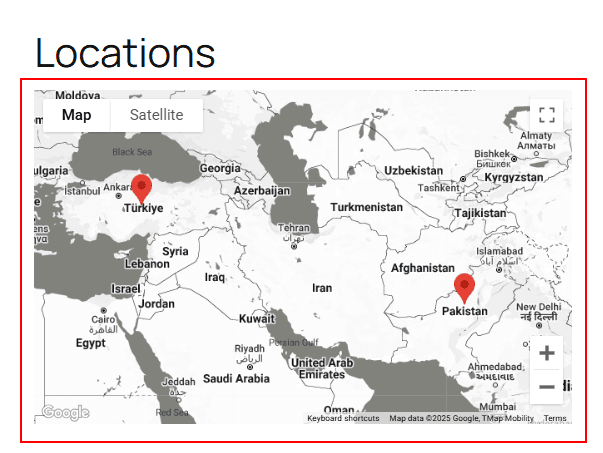
- To display a map with locations added to the selected post type page, the map will only display those specific locations with this shortcode code [SHOW_GPL_MAP]
If no specific locations have been added to a page, the default map will be displayed with all locations linked to that post type.

Shortcodes for Displaying Maps
By using shortcodes, you can display maps tailored to your needs.
- Default Map: To show the default map, simply use the [SHOW_GPL_MAP] shortcode.
- Single Location Map: To display the map for a single location, copy and paste shortcode [SHOW_GPL_MAP pin_id=”0″] where you want to show specific location