Let’s start our quick overview from the plugin’s installation to setting up.
Installation and activation
After successful purchase, you’ll receive an email containing your unique license key and plugin. Download the plugin and activate it on your wordpress website.
After installing and activating the plugin, navigate to your “AIPostPilot License” page of WordPress dashboard. Paste your copied License Key and press the “Activate Plugin” button. (Check your email for a license key).
API Settings
- After license activation, Go to the AIPostPilot Settings page.
Open the API Settings tab: - AI Model: Select your preferred AI model (e.g., GPT or Gemini).
- API Key: Enter the API key for the chosen model (usually obtained from the AI provider).
- Token Limit: Specify the maximum token that will be used in content generation. Higher limits generate longer articles, while lower limits keep content concise.
Save your settings before proceeding.

Automatically Generate Post Titles
1. Go to the AIPostPilot page.
2. In the text field, enter the keywords or phrases relevant to the content you want to create.
3. Click the “Pull PostTitles from AI” button.
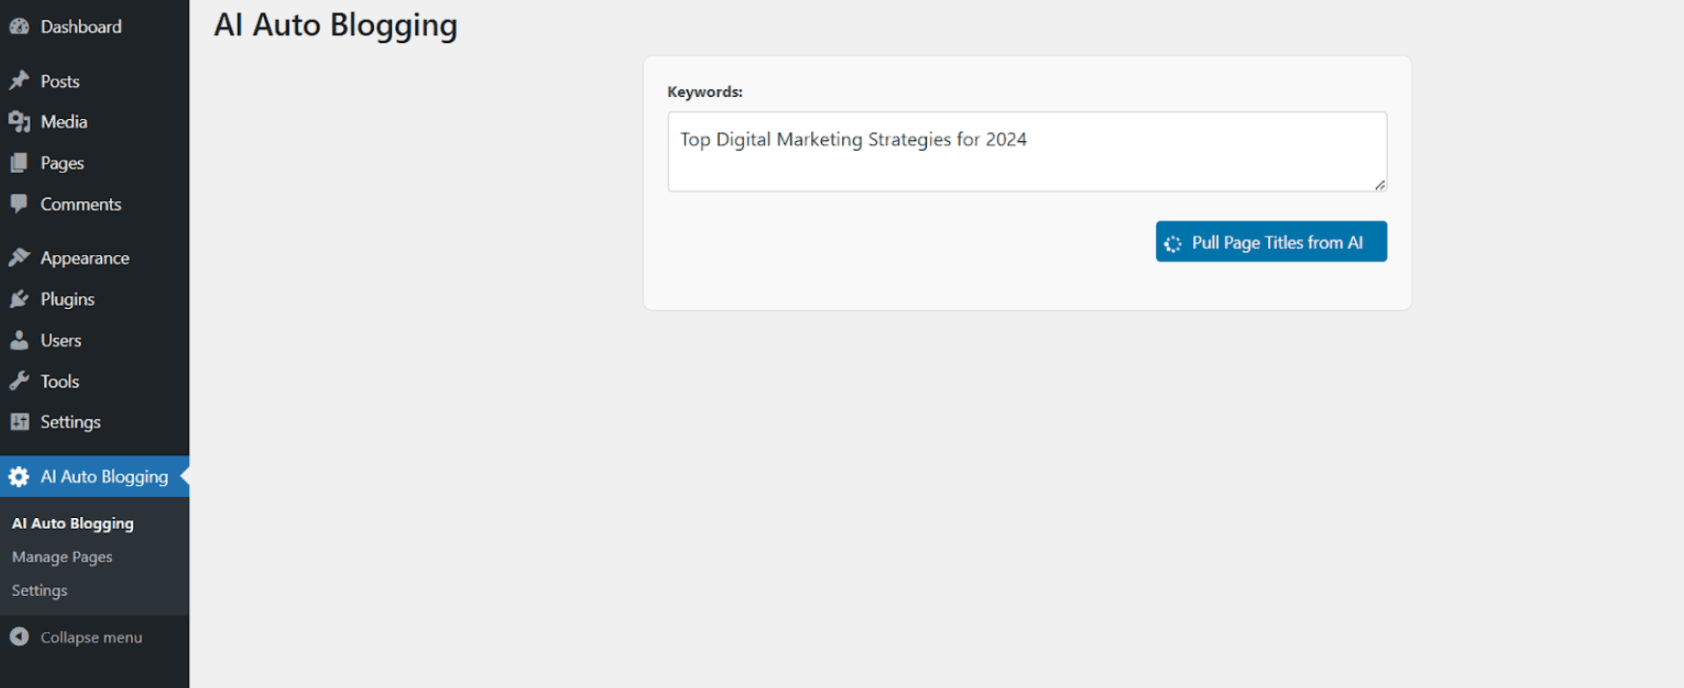
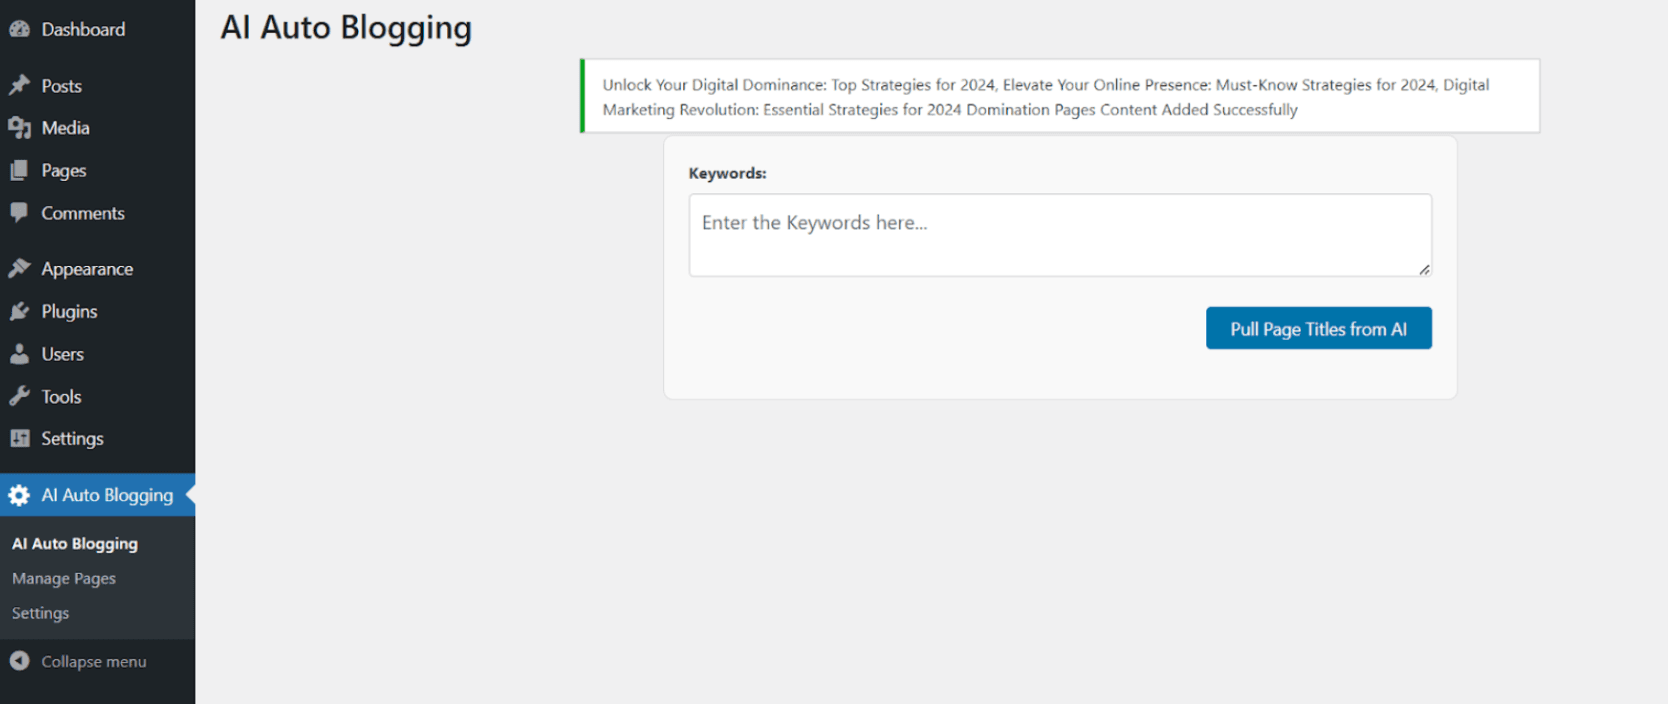
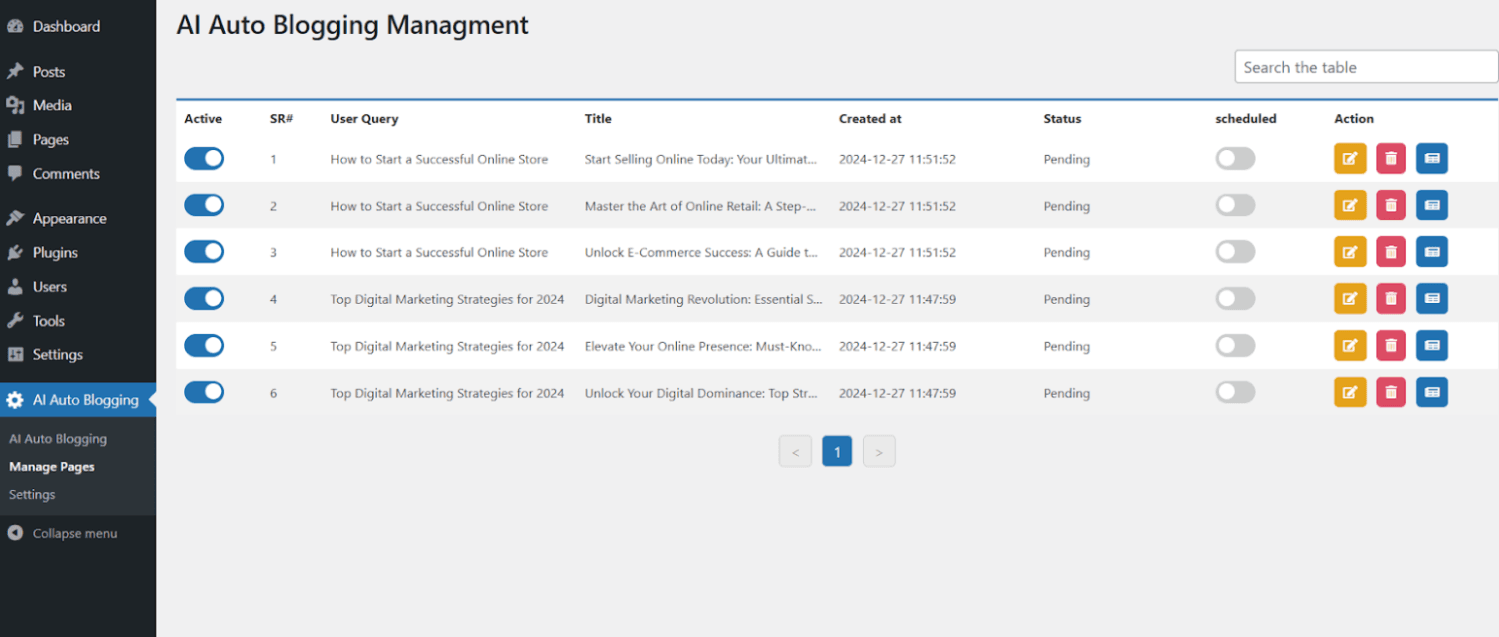
4. The plugin will generate three suggested titles based on the keywords.
- These titles will automatically appear in the Manage Posts page, ready for further actions.
Creating posts from Titles
By automating post generation, you can save time, streamline your workflow, and focus more on content strategy and audience engagement. Follow these steps to generate the content:
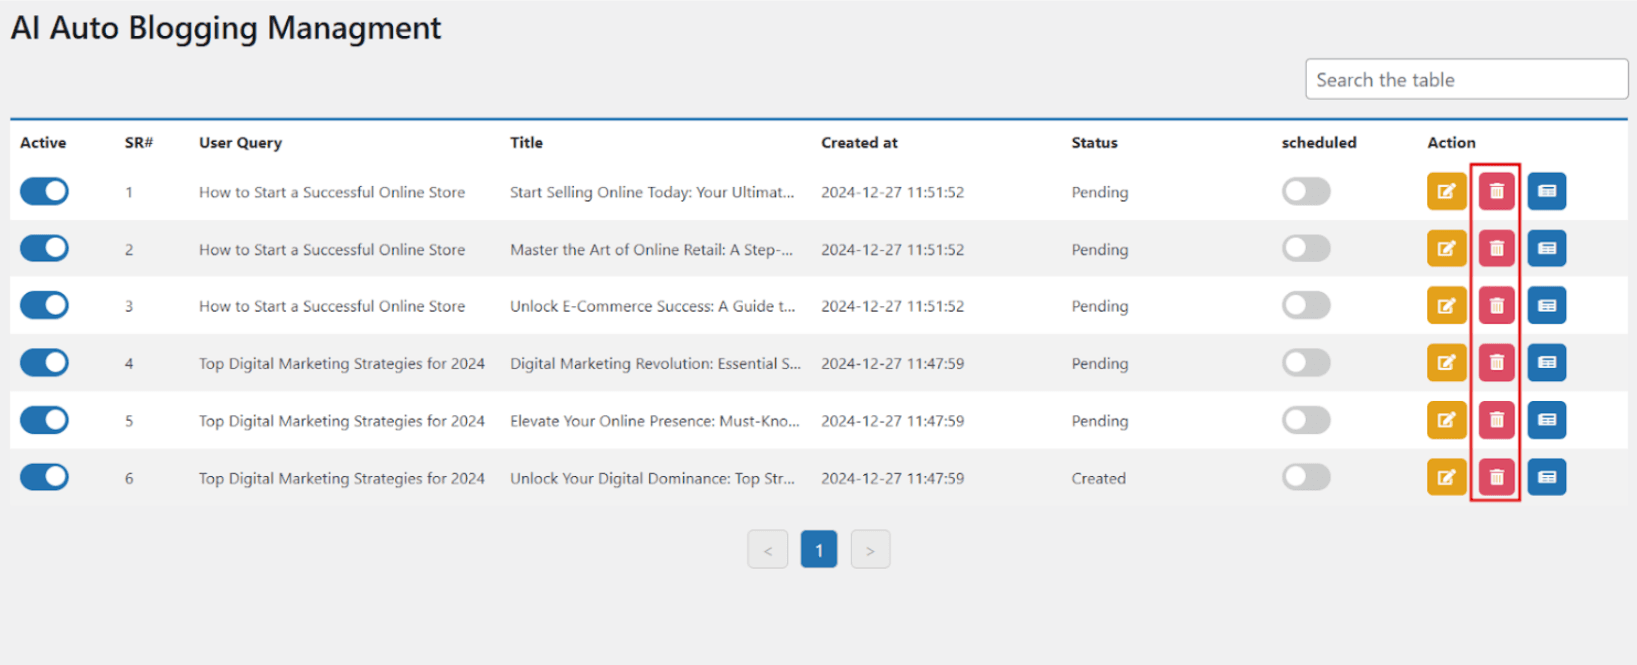
1. Navigate to the Manage Posts page.
2. Find the title you want to use for your post.
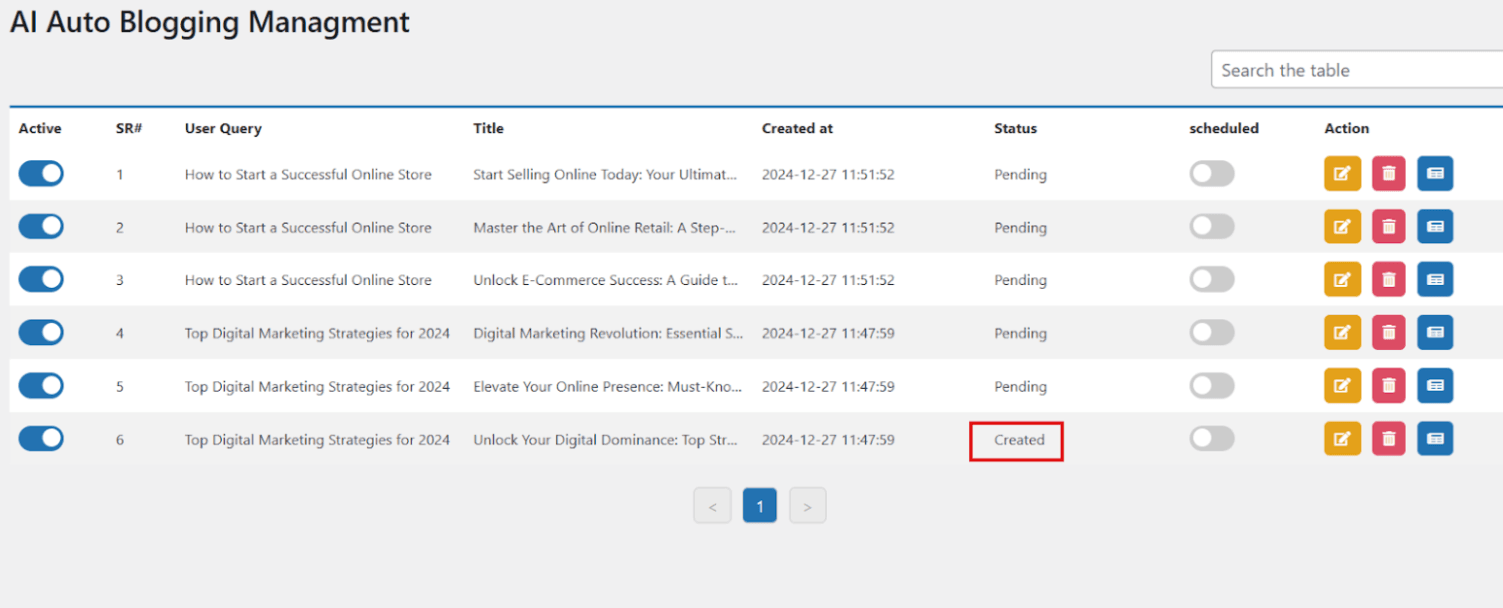
3. Click the create button to generate the article and add it to the main WordPress posts.
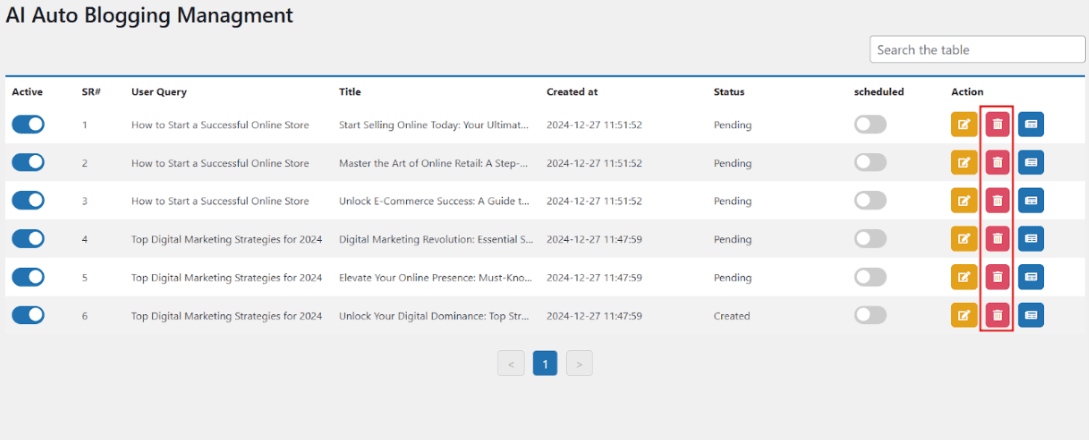
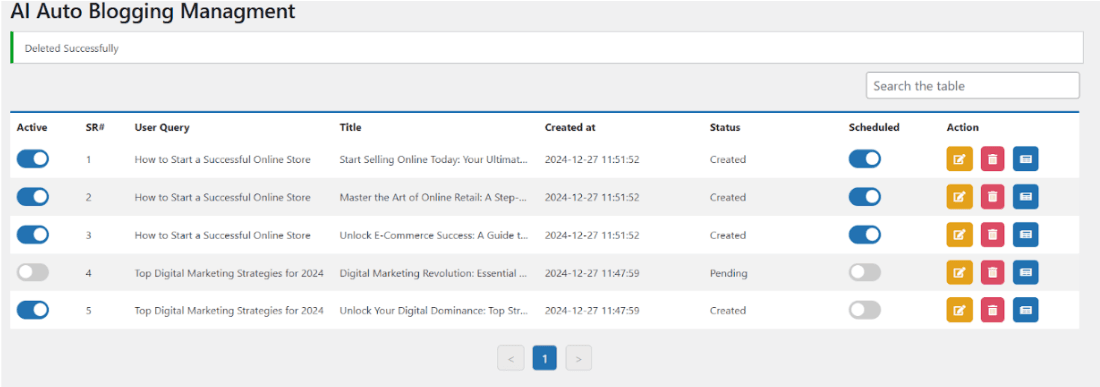
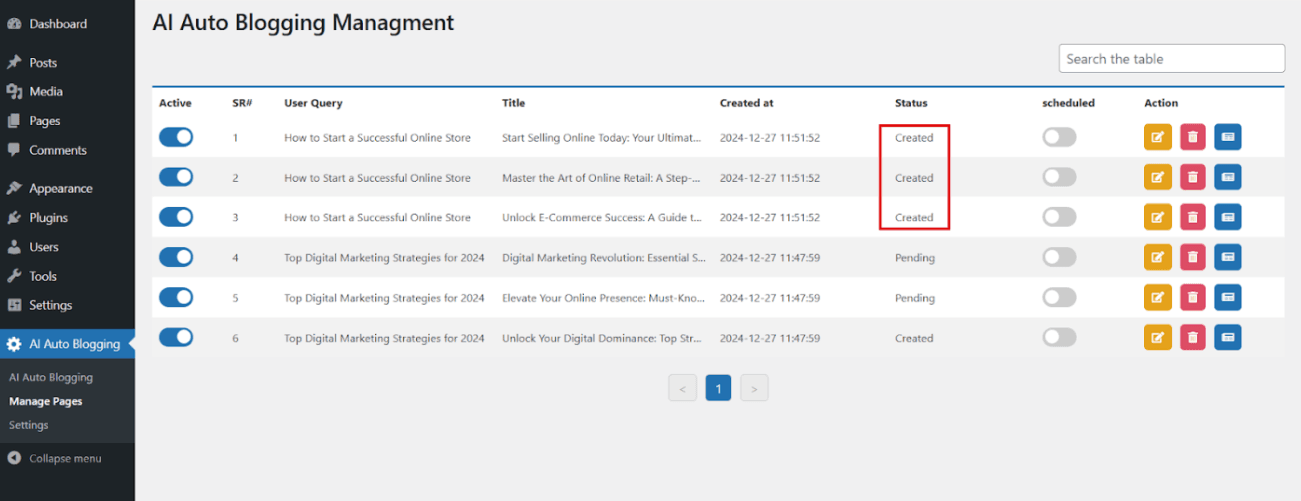
- The status of the article will change from Pending to Created, confirming it has been successfully added to your posts.
4. You can now view the article under Posts → All Posts in your WordPress dashboard.

If other options like Tags, Categories, Meta Title, and others are enabled in your settings, these will be automatically generated when the post is created.

Edit Posts
You can easily customize the post to fit your needs. Follow these steps:
1. Go to the Manage Posts page.
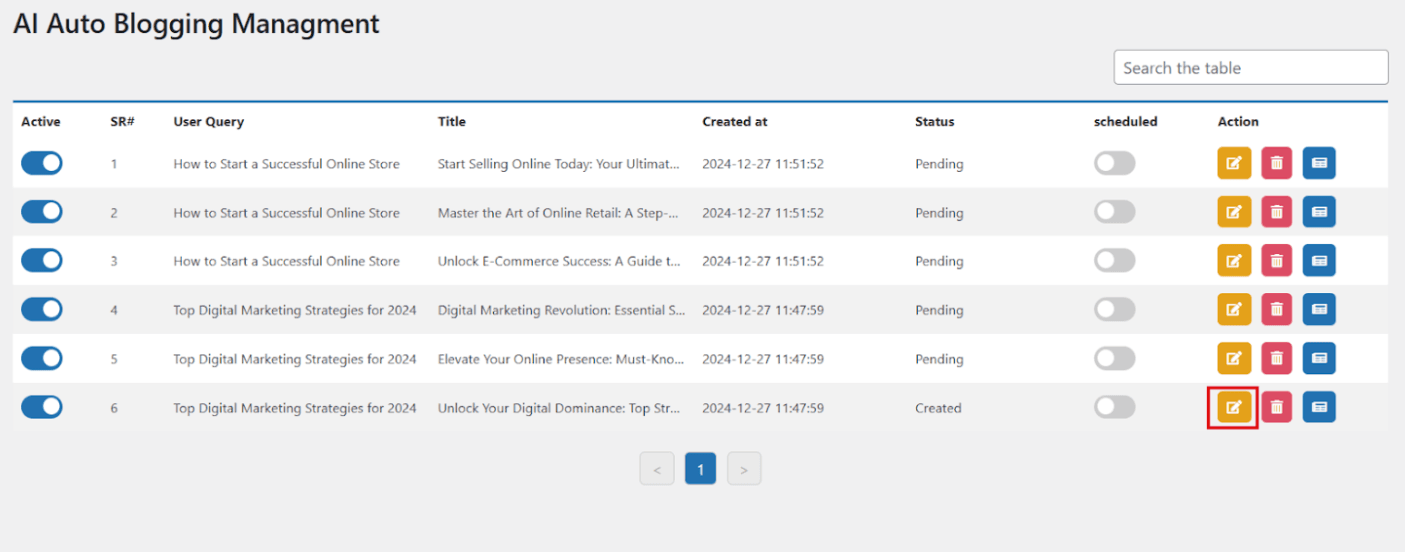
2. Locate a post with the status Created.
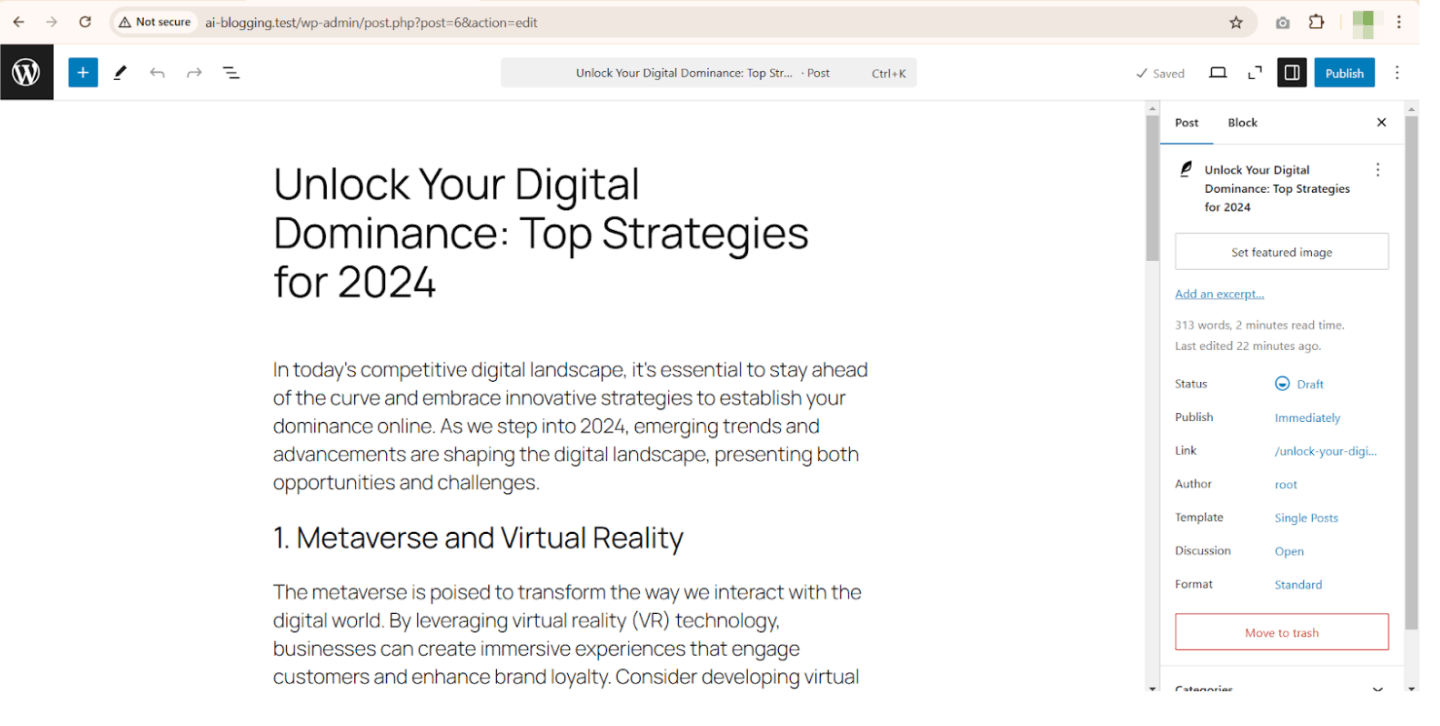
3. Click the edit button to open the editing interface and make any necessary changes.
Delete Articles
If you need to remove a title:
1. Go to the Manage Posts page.
2. Find the title you want to delete.
3. Click the delete button, and it will removed the title from the plugin.
Installation and Updates
Purchase the Plugin
Get started by purchasing the AIPostPilot Plugin from our official website.
Visit Plugin Page
Download the Plugin
After successful purchase, you’ll receive an email containing the plugin file and your unique license key. Download the plugin file to your computer _ it’s your first step to unlocking AI-powered blogging!
Upload and Install
1. Log in to your WordPress dashboard and navigate to the “Plugins” section.
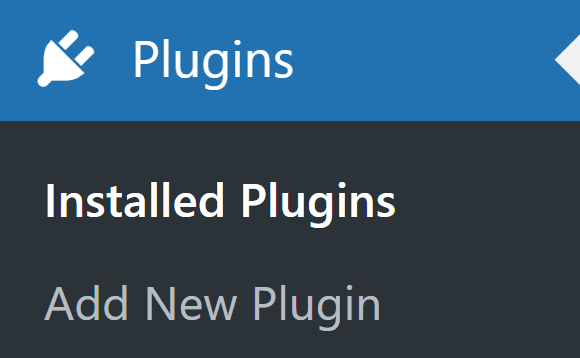
2. Click on “Add New” then “Upload Plugin.”
3. Select the downloaded plugin file and click “Install Now.”
4. After installation, activate the plugin.

Your plugin is installed and ready to go!
License Key Activation
Upon activation, head over to the “AIPostPilot License” page in your dashboard.Simply copy and paste your unique license key into the designated field and activate it. This ensures that you have access to all the latest features, updates, and seamless functionality of the plugin.
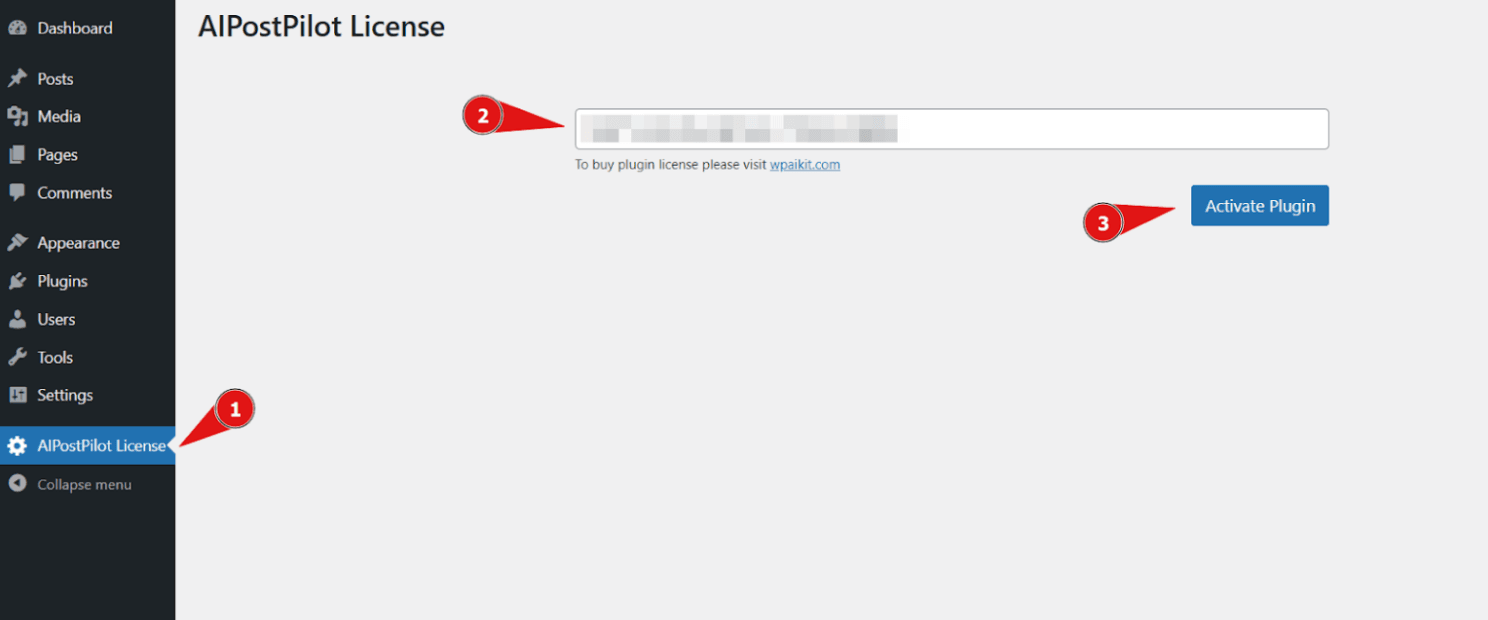
Congratulations! You have unlocked the plugin successfully.
Update the plugin
Keep your plugin updated to access the latest features and fixes:
1. Ensure your license key is active—this enables automatic updates.
2. When an update is available, you’ll see a notification in your WordPress dashboard (either at the top or in the Plugins section).
3. Click Update Now next to the plugin name.
That’s it—your plugin is now up to date!
Settings and Features
The plugin settings are organized into tabs, each offering a variety of features and options to customize your experience.
API Configuration
Model Selection
In the dropdown menu, choose your preferred AI model (GPT-4 or Gemini-Bard). Different models may offer varying capabilities, such as more detailed descriptions or quicker generation times. Select the model that best suits your content creation goals.

API Key
Once you’ve chosen your AI model, enter the appropriate API key in the provided field. Ensure that the API key matches your selected model to avoid any connection errors. The API key authenticates your access to the AI service and ensures smooth functionality.

Max Tokens
Adjust the Max Tokens value based on the content length you want. A higher token limit will generate more detailed and longer content, while a lower limit will create shorter text. Use this setting to control how much content is generated.

Temperature
This setting controls the level of randomness in the generated content. You can set the value anywhere from 0 to 1, with higher values leading to more diverse responses, and lower values providing more predictable text. The default value is set to 0.5.
- For SEO generation, first enable the functionality in the SEO settings.
- Additionally, select the SEO plugin you are using from the dropdown menu in the SEO settings.
- To generate and replace the SEO meta title for a product, press the Generate & Replace SEO Title button.

Frequency and Presence Penalties
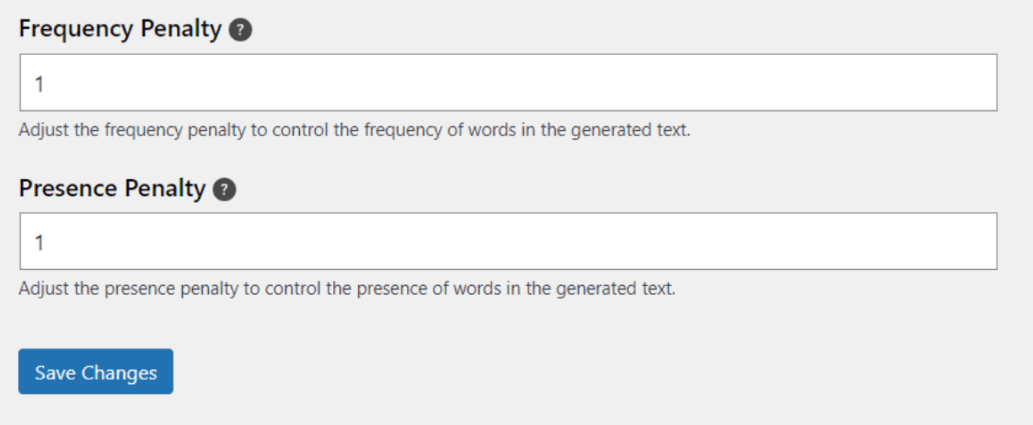
Both the Frequency and Presence Penalty settings help you control how unique the content will be. These values range from 0 to 1, with the default set at 1. A lower value means more repetition in words, while a higher value discourages repetition and encourages more varied vocabulary. Adjust these settings to match your desired content style.
Once you’ve made your changes, click the Save Changes button to apply them.
General Settings
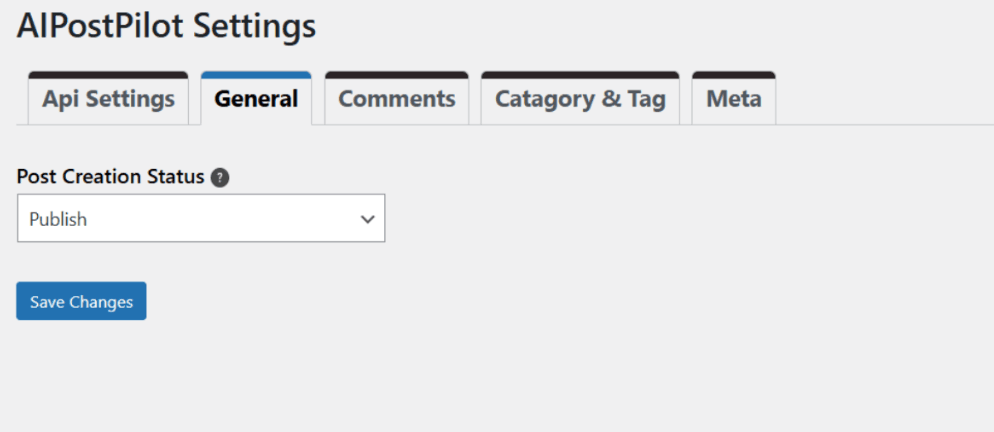
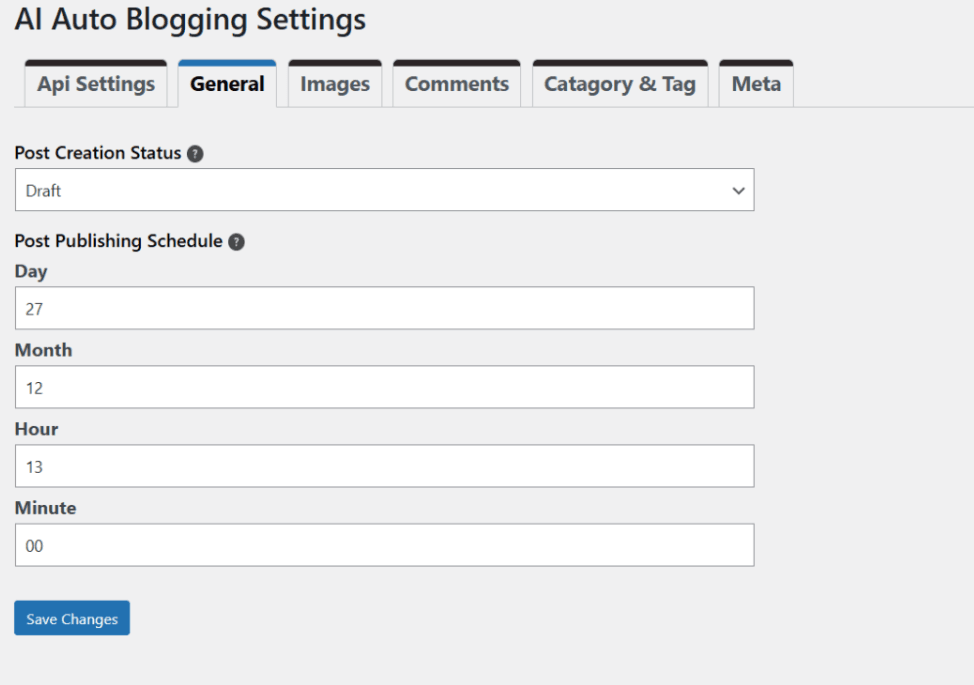
In the general tab, you can choose the status that will display on posts. Two statuses are available in the dropdown (Draft and Publish).

- If you select Draft, a section called Post Publishing Schedule will appear. Here, you can specify the exact date and time for your post to be published, giving you complete control over your publishing schedule.

- If you choose Publish, the post will be published immediately without any delay where the schedule option enables in the Managed Posts created posts.
Note:
When you select any option, you’ll also ON the Schedule button for the created post on the plugin’s Manage Posts section.
Comments Management
The plugin allows you to automatically reply to user comments and detect spam comments effortlessly.
To set this up, go to the Comments section on the AI Auto Blogging settings page:
- Enable the Filter Spam Comments option to block unwanted spam.
- Turn on the Auto Reply option to respond to user comments automatically.
- Choose the author responsible for replying to comments from the dropdown menu.

Categories & Tags
With the plugin, you can easily generate categories and tags for your posts.
To configure:
- Go to the Categories & Tags section in the plugin settings.
- Enable the categories and Tags options.
- And save settings.
When You create the posts this will automatically generate and assign categories and tags to posts based on predefined rules or keywords.

Meta Settings
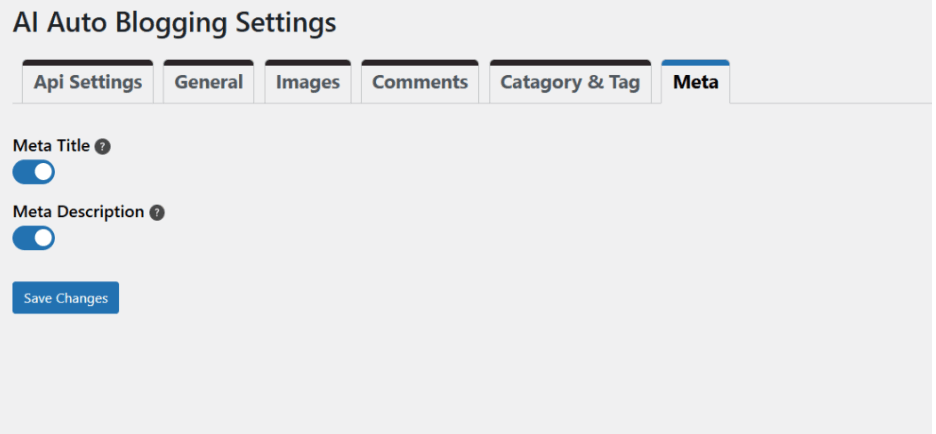
The plugin allows you to automatically generate the Meta Title and Meta Description for your posts.
This feature helps optimize your content for search engines by creating relevant and SEO-friendly meta data. Simply enable the option in the plugin meta settings, and the plugin will handle the rest.
Note:
Make sure that an SEO plugin is also activated on your site to ensure the proper integration and generation of metadata.
Auto Creating the Post titles
The AIPostPilot Plugin simplifies content creation by generating complete posts, including titles, text, tags, and categories, based on your input keywords. Follow the steps below to auto-create posts effortlessly:
1. Go to the AIPostPilot page.
2. Enter the relevant keywords for the title you want to generate.
3. Click the Pull Post Titles from AI button.
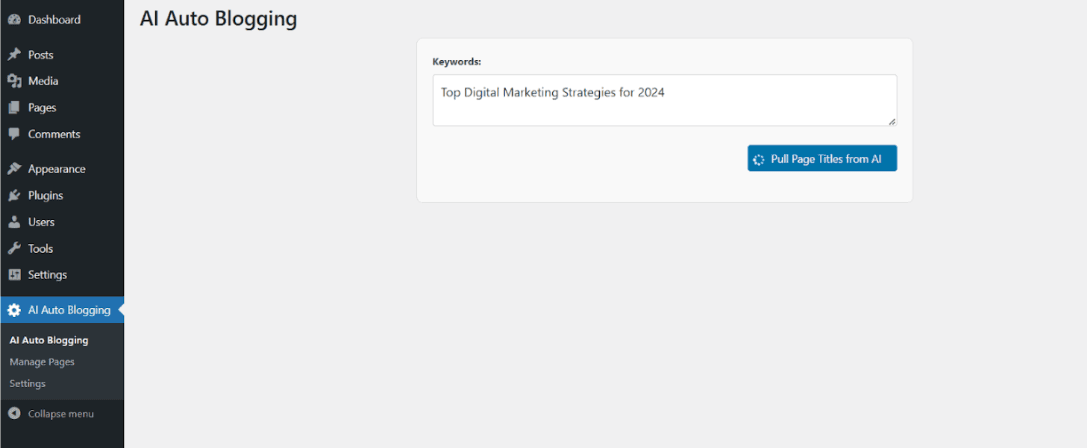
It will generate three unique post titles and add the generated titles to the Manage Posts section for further process.
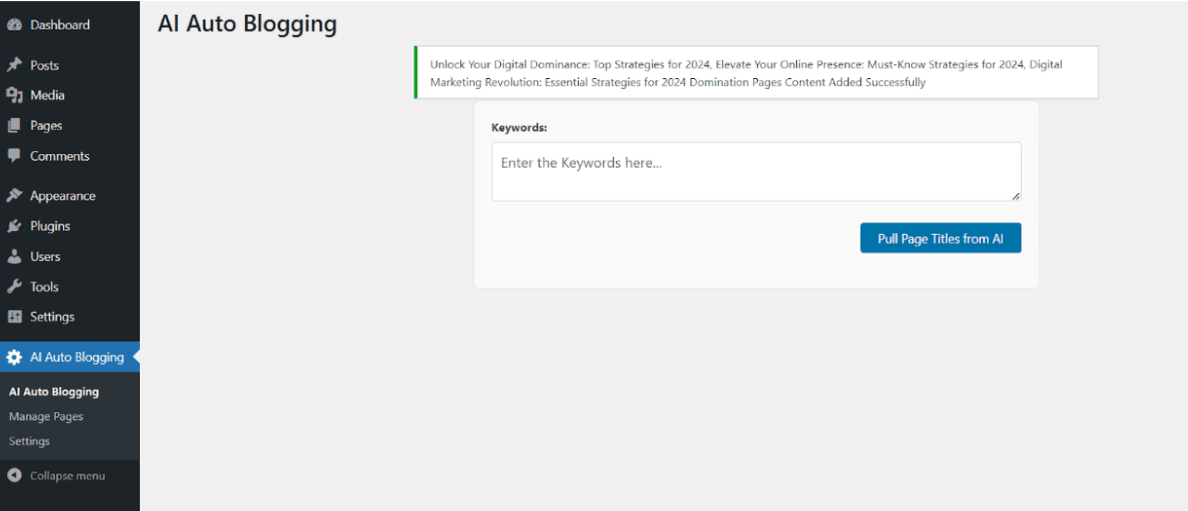
Managing Posts in the AI Auto Blogging Plugin
The Manage Posts section of the AIPostPilot Plugin allows you to publish, edit, or delete articles. Additionally, you can control article creation and scheduling based on the plugin’s settings. Below are the detailed instructions for each action:
Publishing Articles
1. Navigate to the Manage Posts page of the plugin.
2. Locate the article you want to create.
3. Click the create button of the article to create a complete post of that title and add the post into wordpress posts.
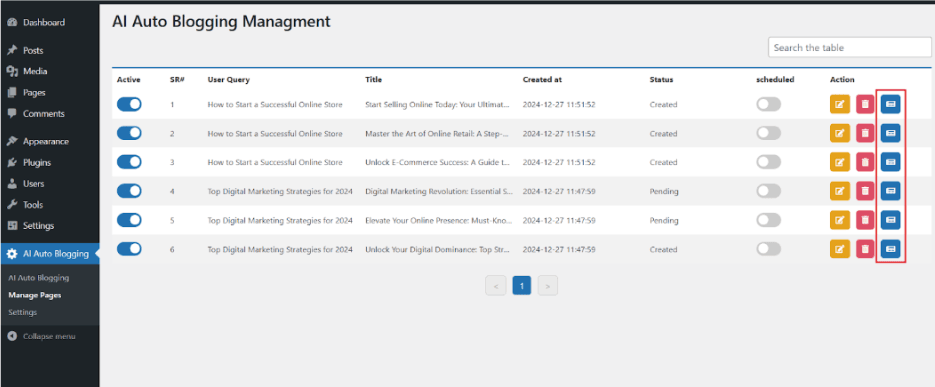
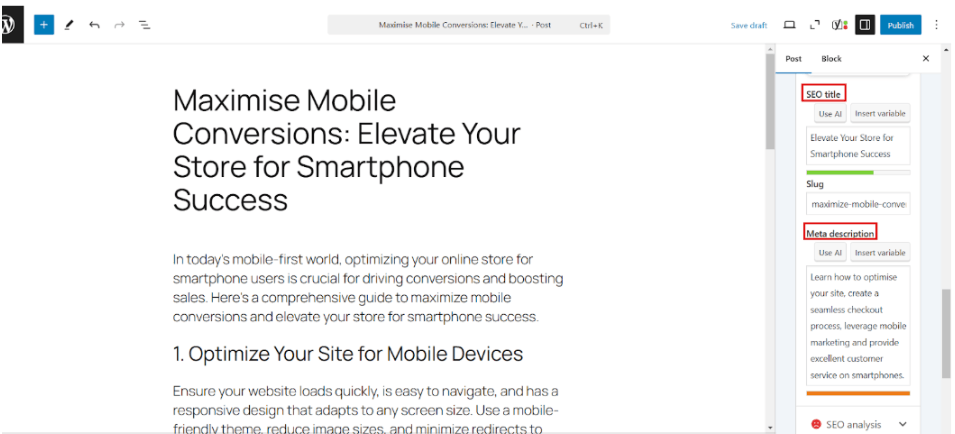
If the categories and tags options are enabled in the settings then the categories and tags of the post will also be generated during post generation.

And if the meta title and meta description are enabled in the plugin settings then their content will display on seo plugin meta title and meta description fields which are activated on site otherwise it will display on wordpress meta title and meta descriptions.
- The article’s status will change from Pending to Created.
- If the Schedule Button is enabled for the article, the post will be published according to the date and time specified in its settings.
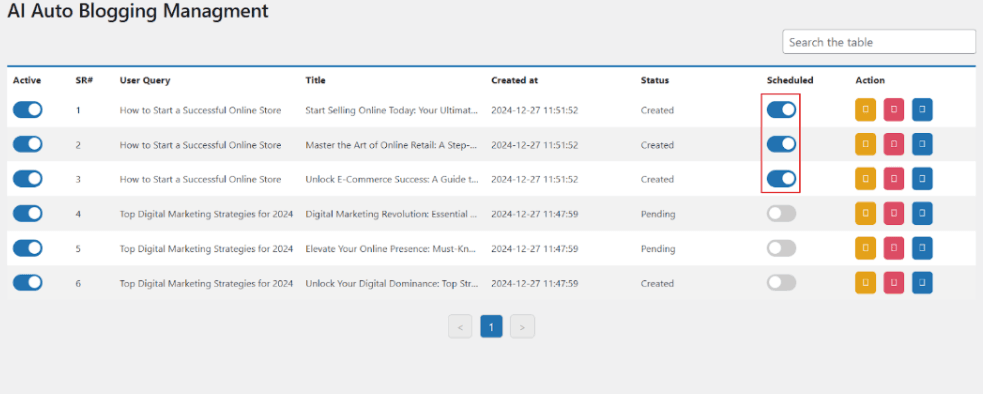
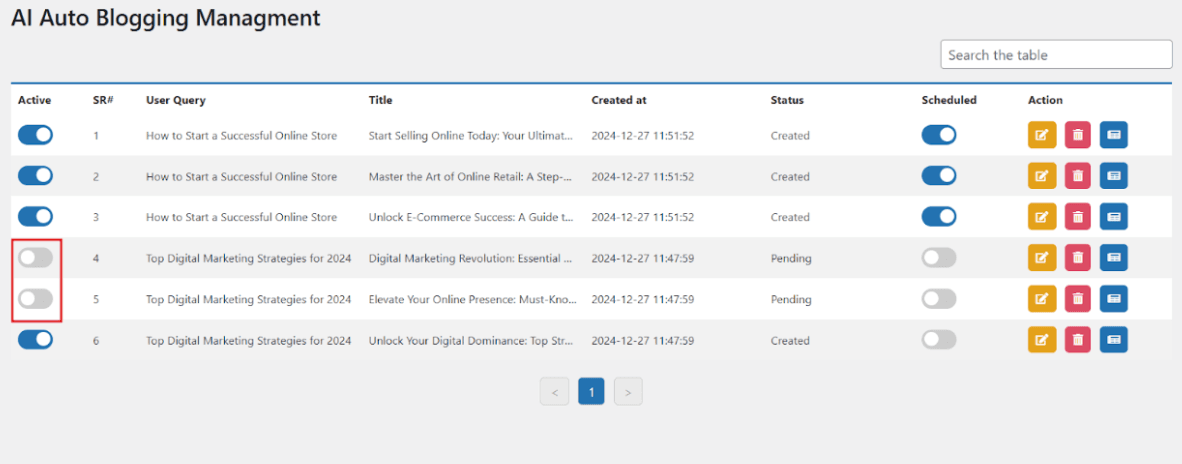
- If the Active Button is turned off for the article, clicking the blue button will not create the post.
Editing Post
To make any necessary changes to the post, follow these steps:
1. To edit an article, locate it in the Manage Posts page.
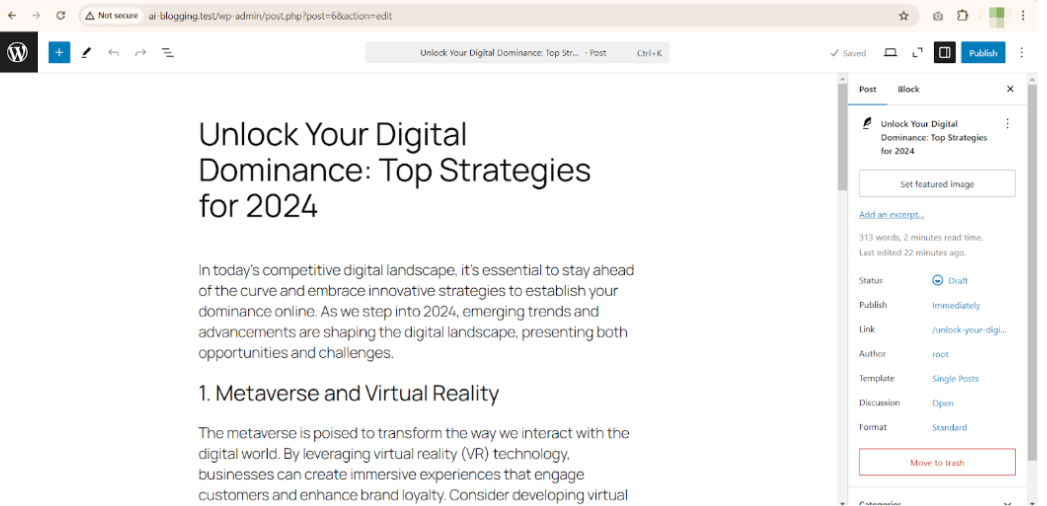
2. Click the edit button of the article.
- Important Note: This option is only available for articles with the status Created. Articles in other statuses, such as Pending, cannot be edited directly.
3. Make the necessary changes and save your edits.

Deleting Titles
For removing the unnecessary titles from the plugin Management page, follow these steps:
1. To delete an article, navigate to the Manage Posts page.
2. Click the delete button next to the article.
3. Confirm the deletion.
