Each form in Formileo comes with its own customizable settings and options, allowing you to tailor it specifically to your needs. Below is a step-by-step guide to accessing and configuring these settings.
Accessing Form Settings
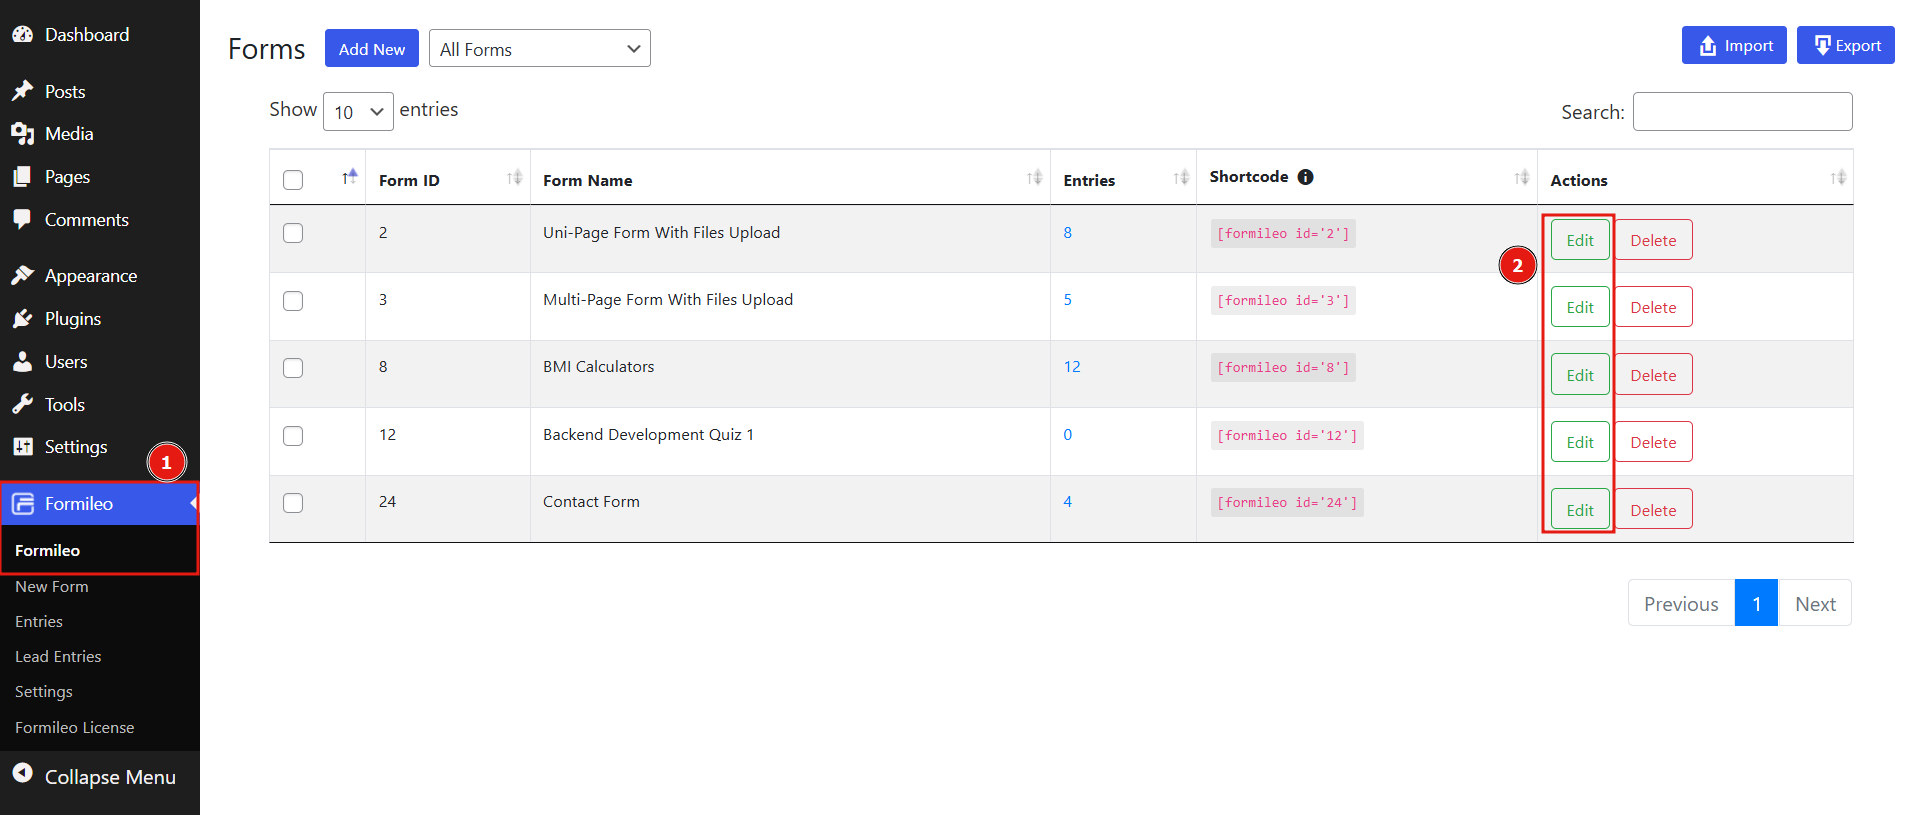
- Go to the Formileo Page in your WordPress admin dashboard.
- Click the Edit button for the form you want to customize.

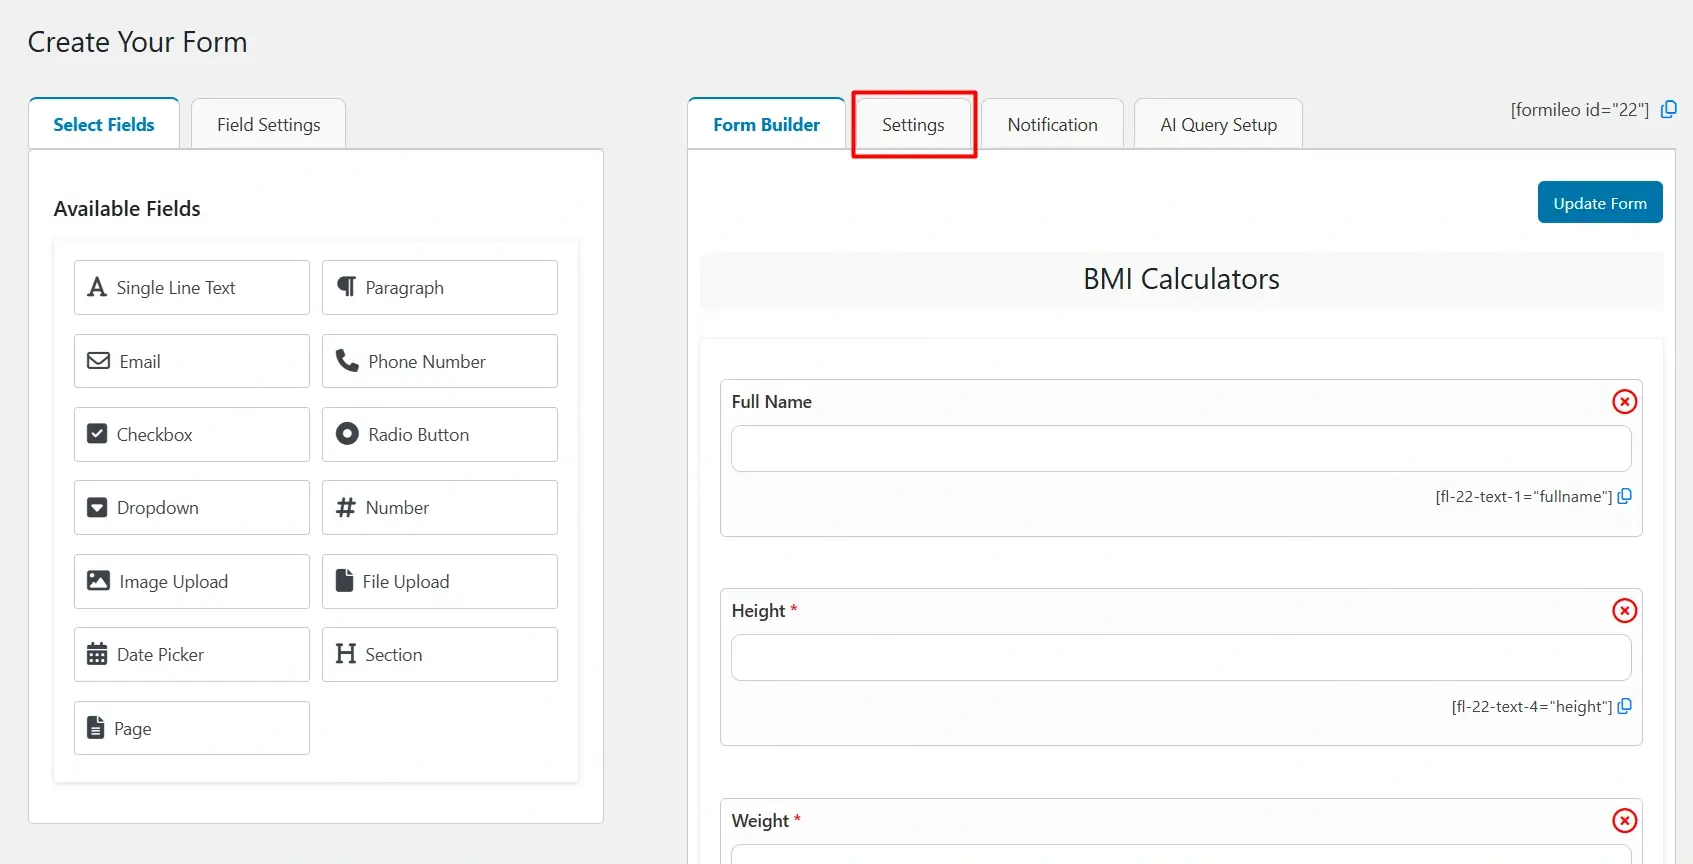
- In the Form Editor, click the Settings tab located next to the Form Builder tab. Here, you can configure settings for your form.

Customizable Form Settings
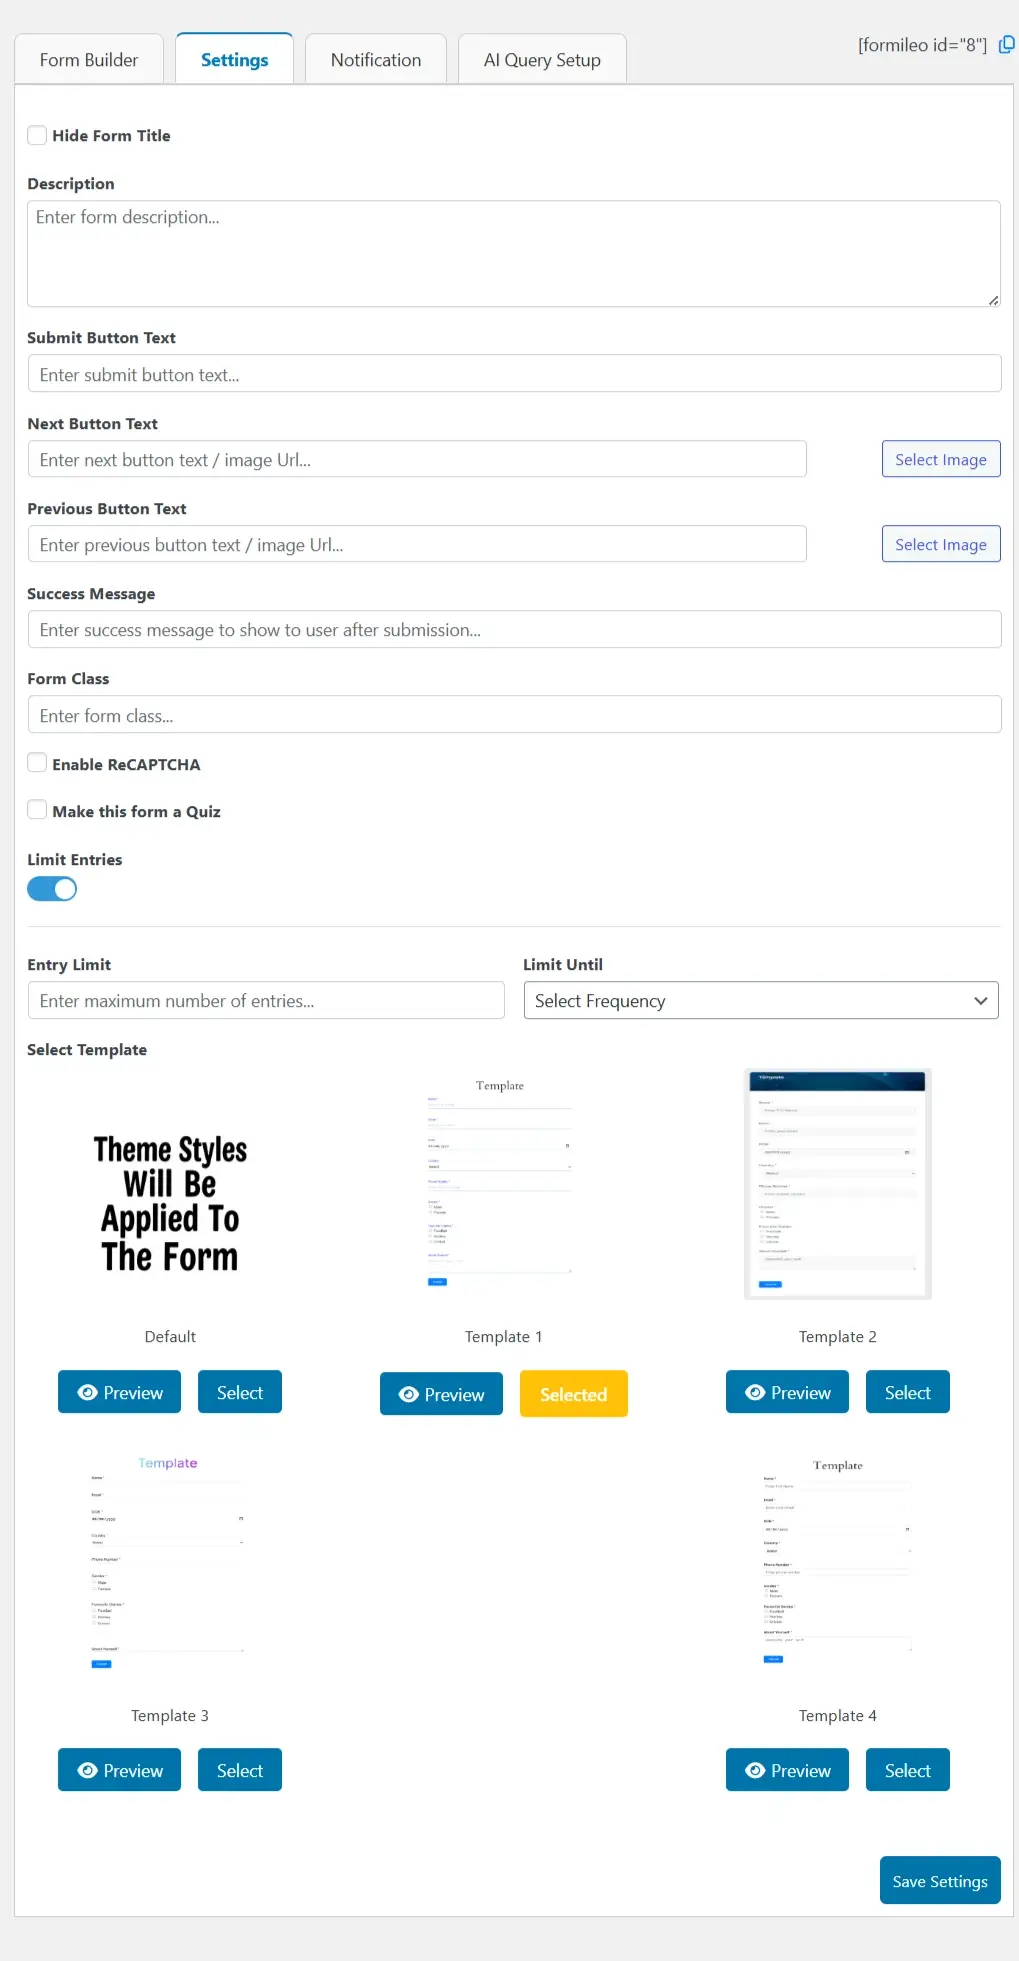
Hide Form Title
Enable this option to hide the form’s title on the front end.

Description
Add an explanatory note or instructions for users. The description will appear below the form’s title on the front end.

Submit Button Text:
Customize the text displayed on the Submit button of your form.

Next Button Text
Enter text or upload an image for the Next button.This button appears only if your form spans multiple pages.
Previous Button Text
Enter text or upload an image for the Previous button. Like the Next button, this appears when your form has multiple pages.

Success Message
Customize a success message that will be displayed to users after the form is successfully submitted.

Form Class
Assign a custom CSS class to the form for additional styling and customization.

ReCAPTCHA
Enable reCAPTCHA protection for the form to prevent spam and automated submissions.
Usage: Once enabled here, reCAPTCHA will be applied to this specific form.

Note: Make sure you have already added your Site Key and Secret Key in the ReCAPTCHA Settings page.
Quiz
Enable this option to turn your form into a quiz
Effect: Once enabled, additional fields will appear for Quiz Duration and Quiz Description, allowing you to set time limits and add instructions or notes specific to the quiz.

Limit Entries
Restrict the number of submissions for a form. When enabled, two additional fields will appear:

- Entry Limit: Specify the maximum number of entries allowed for the form. Once this limit is reached, the form will become inactive.
- Limit Until: Define the limit’s time frame (Daily, Weekly, Monthly, Yearly).

Select Template
To customize the appearance of your form, you can select a specific template:
- Preview the Template
Before applying a template, you can preview it by clicking the Preview button below the desired template.This ensures you pick the best design for your form. - Choose a Template
Click the Select button below the template you wish to use. The selected template will define how the form is displayed on the front end. - Default Behavior
If you do not select a template, the global form template will automatically be applied.Save Settings
Don’t forget to click Save Settings once you are done to commit your form setting changes

